modern guide to witchcraft

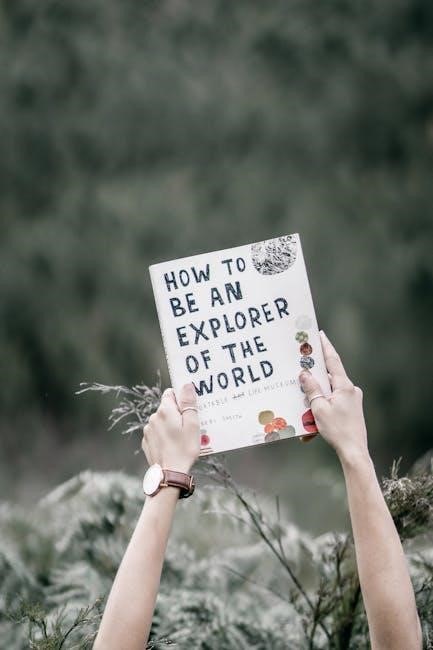
Modern witchcraft is a blend of ancient traditions and contemporary spirituality‚ offering a path for personal growth and empowerment through rituals‚ spells‚ and sacred practices․

1․1 What is Modern Witchcraft?

Modern witchcraft is a dynamic blend of ancient traditions and contemporary practices‚ emphasizing personal empowerment‚ intuition‚ and connection to nature․ It encourages individuals to harness their inner power through rituals‚ spells‚ and sacred spaces‚ fostering self-discovery and spiritual growth․ This eclectic approach allows practitioners to adapt timeless principles to modern life‚ making witchcraft a versatile and meaningful path for today’s seekers of magic and transformation․

1․2 The Appeal of Witchcraft in the Contemporary World

Modern witchcraft captivates today’s world by offering a holistic‚ adaptable spiritual path․ It blends ancient rituals with contemporary practices‚ empowering individuals to embrace their uniqueness and shape their destiny․ The emphasis on self-discovery‚ personal growth‚ and community resonates deeply‚ attracting those seeking meaning and fulfillment in a fast-paced‚ often chaotic modern life․ This versatile practice provides tools for transformation‚ making it a compelling choice for spiritual seekers․

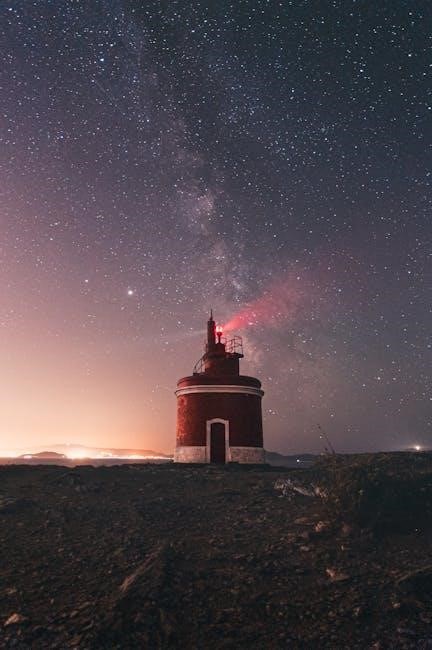
A Brief History of Witchcraft in the West

Witchcraft in the West traces its roots to ancient pagan traditions‚ evolving through centuries of cultural and religious shifts․ Its history reflects both persecution and resilience‚ shaping its modern form․

2․1 Ancient Roots of Witchcraft

Witchcraft’s origins trace back to prehistoric spiritual practices‚ deeply intertwined with paganism and nature worship․ Ancient cultures revered the earth’s power‚ believing in magic as a vital life force․ These early traditions‚ often tied to seasonal cycles and natural phenomena‚ laid the foundation for modern witchcraft‚ blending rituals‚ spells‚ and a profound connection to the divine feminine and masculine energies‚ inspiring contemporary practices focused on personal growth and harmony with nature․

2․2 The Evolution of Witchcraft Practices

Witchcraft practices have evolved significantly‚ adapting to cultural shifts and societal norms․ Early rituals focused on survival and nature‚ while modern practices incorporate diverse traditions‚ personal intuition‚ and ethical frameworks․ Contemporary witchcraft emphasizes individualized spirituality‚ blending ancient customs with modern lifestyles‚ making it accessible and inclusive for a wide range of practitioners seeking meaningful connections to magic and the world around them․

Core Principles of Modern Witchcraft

Modern witchcraft centers on empowerment‚ ethical practices‚ and harmony with nature․ It emphasizes personal growth‚ intention‚ and the responsible use of magic to foster balance and well-being․

3․1 The Law of Attraction and Intention

Central to modern witchcraft‚ the Law of Attraction aligns energy with desire‚ manifesting reality through focused intention․ By channeling thoughts and emotions‚ witches harness their inner power to attract specific outcomes‚ emphasizing the importance of clarity‚ positivity‚ and ethical intent in spellwork and rituals to ensure harmonious results․

3․2 The Importance of Ethics in Witchcraft

Ethics are a cornerstone of modern witchcraft‚ emphasizing the principle of “harm none” and responsible use of power․ Practitioners are encouraged to reflect on the consequences of their actions‚ ensuring their magic aligns with positive intent and respect for all life․ This moral framework guides witches to maintain balance and integrity in their craft‚ fostering a harmonious relationship with the universe and its energies․

Setting Up Your Sacred Space

Creating a sacred space is essential for enhancing rituals and energy․ It promotes good vibes‚ focus‚ and a deeper connection to your magical practice․

4․1 Creating an Altar for Rituals

An altar is a focal point for rituals‚ representing sacred energy․ It often includes candles‚ crystals‚ and symbolic items aligned with your intent․ Personalize it with meaningful objects to enhance your connection and create a powerful space for magic․

4․2 Cleansing and Consecrating Your Space

Cleansing and consecrating your space are essential steps to remove negative energy and prepare for rituals․ Use smudging with sage or palo santo‚ or sprinkle salt water to purify the area․ Consecrate by setting a clear intention‚ invoking divine energy‚ and visualizing a protective light․ This creates a sacred environment for effective spellwork and spiritual connection․

Tools of the Craft

Essential tools like wands‚ athames‚ pentacles‚ and chalices are used to focus energy and intention in rituals․ Each tool has a specific purpose and significance in witchcraft practices․

5․1 Essential Witchcraft Tools

Key tools in modern witchcraft include the wand‚ athame‚ pentacle‚ and chalice‚ each serving specific roles in rituals and spellwork․ The wand channels energy‚ while the athame casts circles․ The pentacle symbolizes balance‚ and the chalice represents abundance․ These tools‚ often crafted from natural materials like wood‚ metal‚ or crystal‚ are personalized to resonate with the practitioner’s intent and energy‚ enhancing their magical practices and connections to the craft․

5․2 How to Use Magical Tools Effectively

Using magical tools effectively involves personalizing and preparing them through cleansing and consecration rituals․ Focus your intention clearly‚ aligning the tool’s energy with your own․ Regular practice strengthens their potency‚ enhancing rituals and spellwork․ Proper care and storage maintain their magical properties‚ ensuring their effectiveness in manifesting desired outcomes and deepening your connection to the craft․

Rituals and Spells

Rituals and spells are essential practices in modern witchcraft‚ offering a powerful way to manifest desires and foster personal growth․ They involve creating incantations‚ potions‚ and charms tailored to specific intentions‚ helping practitioners connect with their inner power and the world around them․

6․1 Basic Ritual Structures

A basic ritual structure in modern witchcraft involves creating a sacred space‚ setting clear intentions‚ and invoking energy through tools like candles‚ crystals‚ or herbs․ Begin by cleansing the area‚ then cast a circle to define your magical boundary․ Call upon divine or elemental forces to assist‚ perform the spell or rite‚ and close by thanking the energies and grounding yourself․ Personalization is key to meaningful practice․

6․2 Simple yet Powerful Spells for Beginners

Simple spells for beginners focus on clear intentions and minimal tools‚ like candles‚ herbs‚ or water․ Attract love with rose petals or promote abundance using green candles․ Cleansing spaces with sage or salt enhances energy flow․ Protective spells using black candles or mirrors shield from negativity․ Grounding techniques like visualizing roots or using crystals help maintain balance․ These practices build confidence and deepen magical connection․

Herbal Magic in Witchcraft

Herbal magic harnesses the power of plants for spells‚ rituals‚ and potions․ Versatile and natural‚ herbs like chamomile‚ lavender‚ and sage are used for healing‚ protection‚ and manifestation․

7․1 Using Herbs in Spells and Potions

Herbs are a cornerstone of magical practices‚ used to infuse spells and potions with natural energy․ Chamomile‚ lavender‚ and sage are popular for their calming and protective qualities․ By incorporating herbs into oils‚ teas‚ or potion recipes‚ practitioners can enhance rituals for healing‚ protection‚ or love․ This practice allows for personalization‚ making each spell or potion uniquely tailored to specific intentions and energies․ Herbs bridge the gap between nature and magic‚ offering a powerful yet accessible way to manifest desired outcomes․

7․2 Herbal Correspondences for Different Intentions

Herbal correspondences link specific plants to magical intentions‚ enhancing spellwork․ Rosemary aligns with mental clarity‚ while lavender promotes peace․ Cinnamon attracts abundance‚ and basil fosters love․ Understanding these associations allows practitioners to select herbs that resonate with their goals‚ creating harmonious and effective magical rituals․ This ancient practice bridges botany and spirituality‚ offering a natural way to amplify intentions and connect with the earth’s energy;

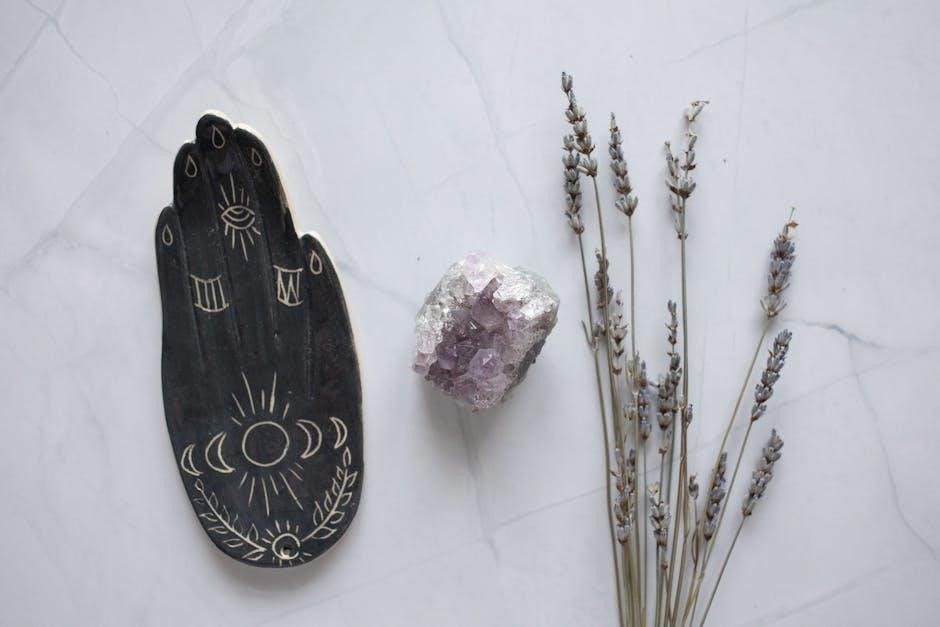
Crystal and Gemstone Magic

Crystals and gemstones possess unique properties‚ amplifying intentions in rituals and spells․ Their vibrant energies align with specific goals‚ enhancing healing‚ protection‚ and manifestation practices in modern witchcraft․

8․1 Properties of Common Magical Stones

Each crystal and gemstone holds distinct properties‚ suited for specific magical intentions․ Quartz amplifies energy and intentions‚ while amethyst fosters intuition and protection․ Rose quartz embodies love and compassion‚ and black tourmaline offers grounding and negative energy repulsion․ These stones‚ when attuned‚ channel powerful vibrations‚ enhancing spells and rituals in modern witchcraft practices․ Their unique energies align with personal goals‚ making them invaluable tools for manifestation and healing․

8․2 Incorporating Crystals into Rituals

Cleanse and charge crystals under moonlight or with smudging to enhance their magical potential․ Set clear intentions before using them in rituals‚ placing them on the body‚ altar‚ or in grids․ Their vibrations amplify spells‚ grounding or elevating energy as needed․ Use crystals in meditation to connect with their essence‚ trusting intuition to guide their placement for maximum effectiveness in modern witchcraft practices․

Divination Practices

Divination practices in modern witchcraft offer a powerful way to gain insight‚ connecting you to subtle energies and the universe․ Use tarot‚ runes‚ or scrying to uncover hidden truths and guide decision-making‚ empowering your spiritual journey․

Tarot and oracle cards are powerful tools in modern witchcraft‚ offering insights into past‚ present‚ and future․ These decks connect you to your intuition and the universe‚ providing guidance for self-discovery and decision-making․ Each card holds symbolic meanings‚ helping you navigate life’s challenges and align with your true path․ Regular use enhances intuition and deepens your understanding of the mystical forces at play․

9․2 Exploring Runes and Scrying

Runes and scrying are ancient divination tools used in modern witchcraft to uncover hidden truths and foresight․ Runes‚ derived from Norse mythology‚ are symbols inscribed on stones or wood‚ offering guidance through their meanings․ Scrying involves gazing into reflective surfaces like water or crystals to access intuition and visions․ These practices deepen connection to the mystical‚ aiding decision-making and self-awareness in a contemporary context․

Witchcraft and Personal Growth

Modern witchcraft serves as a powerful tool for self-discovery and empowerment‚ helping practitioners cultivate self-awareness‚ embrace their true potential‚ and align with their inner truths through intentional practices․

10․1 Witchcraft as a Tool for Self-Discovery

Modern witchcraft offers a profound journey of self-discovery‚ encouraging practitioners to explore their inner world through rituals‚ spells‚ and introspective practices․ By connecting with nature‚ emotions‚ and personal intentions‚ individuals can uncover their true potential‚ align with their values‚ and foster a deeper understanding of themselves․ This path empowers witches to embrace authenticity and transform their lives meaningfully․

10․2 Using Magic for Healing and Empowerment

Modern witchcraft harnesses magic as a powerful tool for healing and empowerment‚ offering rituals and spells to restore balance and strengthen personal energy․ By channeling intention and natural elements‚ practitioners can address emotional‚ physical‚ and spiritual needs․ This transformative practice fosters resilience‚ clarity‚ and confidence‚ enabling individuals to reclaim their power and live authentically․

Love Spells and Relationships

Modern witchcraft offers enchanting love spells and rituals to attract and nurture meaningful connections‚ fostering harmony‚ passion‚ and commitment in relationships through ethical magical practices․

11․1 Attracting Love with Witchcraft

Modern witchcraft provides enchanting ways to attract love through spells‚ rituals‚ and potions․ By harnessing the power of intention and magic‚ individuals can create meaningful connections․ Love spells often involve visualization‚ affirmations‚ and enchanted objects like candles or crystals․ Ethical practices ensure that these rituals respect free will‚ fostering genuine and harmonious relationships․ This approach blends ancient wisdom with contemporary techniques to help individuals manifest their romantic desires effectively․

11․2 Strengthening Relationships Through Magic

Modern witchcraft offers powerful ways to strengthen relationships through heartfelt spells and rituals․ By fostering emotional connection and trust‚ magic can deepen bonds and promote harmony; Practices like shared rituals‚ communication spells‚ and protective charms help nurture relationships․ Ethical considerations ensure respect for all parties involved‚ creating a foundation of mutual understanding and love․ This approach blends magic with meaningful interaction to fortify relationships effectively․

Seasonal Celebrations and Sabbats

Modern witchcraft honors the Wheel of the Year‚ celebrating Sabbats like Samhain‚ Yule‚ and Beltane; These seasonal rituals connect practitioners to nature’s cycles and divine energy‚ blending tradition with personal practices to mark life’s transitions and foster spiritual growth․

12․1 The Wheel of the Year

The Wheel of the Year is a cycle of eight Sabbats marking nature’s seasons‚ guiding modern witches to honor life‚ death‚ and rebirth․ These sacred celebrations—such as Samhain‚ Yule‚ and Beltane—connect practitioners to Earth’s rhythms‚ fostering spiritual growth and balance․ Rituals and reflections during these times deepen the connection to the divine and the natural world‚ blending tradition with contemporary practices to enrich modern witchcraft;

12․2 Celebrating Major Sabbats

Major Sabbats like Samhain‚ Yule‚ and Beltane mark pivotal moments in nature’s cycle․ These celebrations honor the balance of light and dark‚ life and death‚ fostering connection to the Earth’s energies․ Rituals may include feasting‚ divination‚ or symbolic acts to align with seasonal themes․ They serve as powerful reminders of the ever-turning Wheel of the Year‚ enriching modern witchcraft with timeless traditions and spiritual renewal․

Ethics and Responsibility in Witchcraft

Modern witchcraft emphasizes ethical practices‚ ensuring magic is wielded responsibly․ It encourages mindfulness of intentions‚ consequences‚ and respect for others‚ fostering a harmonious balance in all actions․

13․1 The Importance of Magical Ethics

Magical ethics are crucial in modern witchcraft‚ ensuring practices align with integrity and responsibility․ They guide witches to avoid harm‚ respect free will‚ and use magic for positive outcomes․ Ethical frameworks promote self-awareness‚ accountability‚ and harmony with the universe․ By adhering to these principles‚ witches foster trust and balance‚ enhancing both personal growth and collective well-being through mindful‚ intentional spellwork and rituals․

13․2 Avoiding Common Pitfalls in Witchcraft

Practitioners must beware of common pitfalls‚ such as ignoring ethical guidelines‚ misusing magic for manipulation‚ or relying excessively on external tools․ Overconfidence and lack of proper intent can lead to unintended consequences․ Grounding oneself in clear intentions‚ respecting natural laws‚ and maintaining humility are key to avoiding these traps and ensuring a balanced‚ ethical practice of modern witchcraft․

Continue Reading

stockings size guide

Discover the importance of finding your perfect fit with our comprehensive stockings size guide. Learn how to measure, choose the right size, and maintain your stockings for ultimate comfort and style.

How to Measure for Stockings

Accurately measure your hips and thighs using a flexible tape measure while standing to ensure a perfect fit. Proper measurements guarantee comfort and durability for the best fit.

Measuring Your Hips

Wrap a flexible tape measure around the widest part of your hips, keeping it level and parallel to the floor. Stand upright and ensure the tape isn’t too tight or loose. This measurement is crucial for determining your stocking size, as it ensures proper fit and comfort. For accurate results, measure without clothing or with a thin garment. Different brands may vary slightly, so always refer to their specific size charts for the best fit.

Measuring Your Thighs

Measure the circumference of your thigh while standing, using a flexible tape measure. Wrap it around the widest part of your thigh, mid-way between the knee and groin. Ensure the tape is level and not too tight or loose. This measurement helps determine the correct compression level and fit for your stockings. Accurate thigh measurement is essential for comfort and proper support, especially for thigh-high styles. Different brands may have slightly varying size charts, so always check their specific guidelines for the best fit.

Stockings Size Chart

A stockings size chart provides measurements based on height, weight, and hip circumference. Sizes range from XS to XL, ensuring a perfect fit for every body type. Always refer to specific brand guides, like ASOS or SPANX, for accurate sizing, as charts may vary slightly between brands. Proper fit ensures comfort and durability;

Standard Size Chart

The standard size chart for stockings typically ranges from XS to XL, based on height, weight, and hip measurements. Sizes are determined by specific metrics, ensuring a snug yet comfortable fit. For example, XS fits heights 4’9″-5’2″ with hips 32-34 inches, while XL accommodates heights 5’6″-5’9″ with hips 40-42 inches. Always refer to the chart for accurate sizing, as measurements may vary slightly between brands. Proper fit enhances comfort and durability.

Plus-Size Chart

The plus-size chart offers extended sizing options for stockings, catering to curvier figures. Sizes typically range from 1X to 4X or 2X to 5X, depending on the brand. Hip measurements and height are key factors, with 1X often fitting hips up to 42 inches and heights around 5’6″-5’9″. Each size ensures a comfortable, flattering fit without compromising on style or quality, making it easier for all body types to find their perfect pair.

Factors Affecting Stockings Fit

Fabric type, compression levels, and activity significantly impact stockings fit. The right fabric ensures comfort, while compression levels provide support. Activity levels determine durability and stretch needed for optimal performance.

Fabric Type and Stretch

The fabric type and its stretch play a crucial role in stockings fit. Nylon and spandex blends offer elasticity, while cotton provides breathability. Wool ensures warmth, and silk offers luxury. High-stretch fabrics adapt to your body, ensuring comfort and flexibility; The right fabric choice impacts durability and how well stockings maintain their shape. Consider your lifestyle and needs when selecting fabric to ensure optimal fit, comfort, and performance throughout the day.

Compression Levels

Compression levels in stockings are measured in mmHg (millimeters of mercury) and vary to suit different needs. Light compression (8-15 mmHg) offers mild support, while medium (15-20 mmHg) provides firmer support. High compression (20-30 mmHg) is for medical conditions like varicose veins. The right level ensures comfort and effectiveness. Always consult a professional for medical-grade compression to ensure proper fit and health benefits. Proper compression enhances circulation and reduces discomfort throughout the day.

Activity and Usage

Your lifestyle and activity level significantly impact your choice of stockings. For everyday wear, opt for breathable, moisture-wicking fabrics. If you’re active or athletic, consider high-compression stockings for support. Formal events may require sleek, seamless designs. Stockings for medical purposes often feature graduated compression. Always match your stockings to your activity to ensure comfort, durability, and the right level of support throughout the day. Proper fit enhances performance and satisfaction.

How to Choose the Right Size

Use size charts effectively by matching your measurements to the guide. Consider fabric stretch, activity level, and personal comfort preferences for the best fit.

Using Size Charts Effectively

Accurately measure your hips, thighs, and height to align with size charts. Refer to specific guides like ASOS or SPANX, which base sizes on hip circumference and height. Ensure fabric type and stretch are considered for comfort. Use shoe size as a reference for certain styles. If between sizes, opt for the larger one. Double-check weight and height recommendations for compression tights to ensure a proportional fit.

Considering Fabric Stretch

Fabric stretch plays a crucial role in stockings fit. Choose stretchier materials like spandex or elastane for better comfort and flexibility. Thicker fabrics, such as 40 denier, offer less stretch, while thinner ones, like 10 denier, provide more. Consider your weight, height, and activity level when selecting fabric type. For larger sizes, opt for fabrics with higher elasticity. Always check the size guide for specific fabric stretch recommendations to ensure the best fit.

Tips for a Perfect Fit

Tips for a Perfect Fit

Ensure a perfect fit by measuring key areas, selecting fabric based on activity, and trying stockings on for comfort and style. Proper fit enhances durability and comfort.

Trying Them On

When trying on stockings, ensure a smooth fit by standing up and checking for evenness. The fabric should feel snug but not restrictive. Pay attention to the gusset placement for comfort. If the stockings sag or dig into your skin, they may be the wrong size. Try them on in the morning for the most accurate fit, as legs can swell slightly throughout the day.

Shoe Size Consideration

While shoe size isn’t the primary factor in choosing stockings, it can influence fit, especially for knee-high styles. ASOS, for example, designs their one-size hosiery to fit UK shoe sizes 3-8. However, shoe size alone doesn’t determine stocking size, as leg length and circumference play a larger role. Always combine shoe size with thigh and hip measurements for the best fit and comfort.

Types of Stockings

Stockings come in various styles, including thigh-high, knee-high, hold-ups, and over-the-knee options, catering to different preferences, outfits, and occasions for a perfect blend of comfort and style.

Thigh-High Stockings

Thigh-high stockings are a popular choice, offering both style and comfort. They typically reach just above the thigh and are secured with garters or silicone bands. Available in various materials like lace, fishnet, or opaque fabrics, they suit different outfits and occasions. Sizing is based on thigh circumference and height, ensuring a snug fit. To choose the right size, measure your thigh and refer to the size chart for the best comfort and appearance.

Knee-High Stockings

Knee-high stockings are a versatile and practical choice, designed to reach just above the knee. They are ideal for everyday wear and can complement both casual and formal outfits. Sizing is typically determined by thigh circumference and height, ensuring a comfortable fit. To ensure accuracy, measure the widest part of your thigh and refer to the size chart. Proper fit prevents tightness or sagging, guaranteeing all-day comfort and style.

Popular Stockings Brands and Their Size Guides

Leading brands like ASOS and SPANX offer detailed size charts, ensuring a perfect fit. Their guides consider factors like height, weight, and hip measurements for ultimate comfort and style.

ASOS Size Guide

ASOS offers a one-size hosiery option designed to fit a wide range of body types. Their stockings cater to hips measuring up to 101cm and heights up to 57cm. ASOS ensures comfort and style by providing detailed size charts that consider both height and hip measurements. This guide helps customers find the perfect fit effortlessly, making ASOS a trusted choice for stocking shoppers seeking quality and convenience.

SPANX Size Guide

SPANX offers a comprehensive size guide to ensure a perfect fit for all body types. Their stockings are designed to cater to various sizes, with a focus on comfort and style. SPANX recommends choosing a size based on height and weight, with detailed charts provided for accuracy. If between sizes, opting for the larger size is advised. This ensures optimal comfort and a seamless fit, making SPANX a trusted choice for hosiery enthusiasts.

Maintenance Tips

Proper care ensures longevity. Wash stockings gently in cold water, avoid fabric softeners, and store in a cool, dry place to maintain quality and fit.

Washing Instructions

For optimal care, wash stockings in cold water using a mild detergent. Avoid fabric softeners and bleach, as they can damage fabrics. Gently hand wash or use a delicate cycle. Do not wring or twist, as this can stretch or tear the material. Air-dry away from direct sunlight to maintain shape and color. Avoid machine drying, as heat can shrink or weaken elastic. Proper washing ensures durability and retains the stocking’s original fit and quality.

Storage Advice

Store stockings in a cool, dry place to maintain their quality. Fold or roll them gently to avoid creases and damage. Use a drawer organizer or breathable fabric pouches to keep them separate and prevent tangling. Avoid direct sunlight, as it can fade colors. Do not leave stockings bunched or folded for extended periods, as this can cause permanent wrinkles. Proper storage ensures your stockings remain soft, elastic, and in excellent condition for longer.

Continue Reading

necromancer leveling guide gw2

Embark on a journey mastering the Necromancer, a versatile profession wielding dark magic, summoning minions, and utilizing wells for both offense and survivability, making them a formidable force in Tyria.

1.1 Overview of the Necromancer Profession

The Necromancer is a versatile profession in Guild Wars 2 that excels at both dealing damage and providing utility through dark magic. Known for summoning minions and casting powerful wells, Necromancers can adapt to various playstyles, making them a popular choice for both new and experienced players. Their ability to manipulate life force and death makes them highly effective in open-world exploration, PvE, and PvP. With a focus on survivability and crowd control, Necromancers are well-suited for solo play and group content alike. This profession offers a unique blend of mobility, sustain, and burst damage, making it a compelling option for players who enjoy mastering complex mechanics and strategies.

1.2 Importance of Leveling Builds for Necromancers

Leveling builds are crucial for Necromancers to ensure efficient progression and adaptability in early-game content. A well-structured build enhances survivability, damage output, and utility, allowing players to tackle challenges effectively. Necromancers benefit from focusing on specific traits and skills that synergize with their playstyle, such as minion mastery or well usage. A proper leveling build helps manage resource consumption and optimizes skill rotations, making the journey to max level smoother. Additionally, it enables players to experiment with different playstyles while maintaining strong performance in open-world activities and story content. Investing time in crafting a solid leveling build ensures a strong foundation for endgame success and enhances overall enjoyment of the game.

Primary Skills for Necromancer Leveling

Necromancers rely on minions and wells for offense, while defensive skills like Spectral Walk enhance survivability. Mastering these abilities ensures versatility and efficiency during the leveling process.

2.1 Offensive Skills: Minions and Wells

Necromancers excel at dealing damage through minions and wells, which provide sustained offense and area control. Summoning minions like Skeletons, Zombies, and Spectral Minions offers versatility in combat, with each type fulfilling unique roles. Wells, such as Well of Darkness and Well of Blood, create zones of damage and apply debilitating conditions to enemies. These skills synergize well with weapons like the Staff and Dagger, enhancing your ability to manage groups of foes. Properly timing minion summons and well placements ensures consistent damage output, making them core components of an effective leveling build.

2.2 Defensive Skills: Survivability and Utility

Necromancers possess a range of defensive skills to enhance survivability and provide utility in combat. Spectral Walk allows teleportation, evading attacks and repositioning quickly, while Plague Signet deals damage over time and heals the Necromancer. The Death Magic trait line offers skills like Blood is Power, converting life force into healing. These abilities, combined with minion summons, create a balance of offense and defense, ensuring durability during leveling. Proper use of these skills enables Necromancers to withstand prolonged fights and maintain momentum in open-world content.

2.3 Key Skill Unlock Progression

Unlocking key skills and traits is crucial for a Necromancer’s effectiveness. Begin by acquiring Spectral Walk early for mobility and survivability. Wells of Suffering and Wells of Darkness provide sustained damage and crowd control, while Minion Mastery enhances minion performance. At higher levels, prioritize traits like Spite, Soul Reaping, and Death Magic to amplify damage and survivability. Key skill unlocks include Blood Wave for healing and damage, and Signet of Spite for utility. Progression should focus on balancing offense and defense, ensuring the Necromancer remains versatile and resilient throughout the leveling process. Proper skill and trait progression ensures a smooth journey from early levels to endgame readiness.

Best Leveling Build for Necromancer

The optimal leveling build focuses on Staff for open-world efficiency, paired with Dagger for condition damage and Axe for cleave. Traits like Spite, Soul Reaping, and Death Magic maximize damage and minion support, ensuring a versatile and powerful progression through Tyria.

3.1 Core Traits: Spite, Soul Reaping, and Death Magic

The Spite trait line enhances your damage output against weakened foes, making it ideal for aggressive playstyles. Soul Reaping focuses on minion mastery, boosting their effectiveness and survivability, while also granting you life force generation. Lastly, Death Magic improves your survivability by increasing health and offering healing opportunities through corpse consumption. Together, these traits create a balanced build that excels at both dealing damage and managing minion armies. Prioritizing Spite and Soul Reaping early ensures strong minion synergy, while Death Magic provides the sustain needed for open-world leveling. This combination is versatile and powerful, making it the cornerstone of any efficient Necromancer leveling build in Guild Wars 2.

3.2 Weapon Choices: Axe, Dagger, and Staff

The Axe offers high damage and mobility, making it ideal for aggressive playstyles, while the Dagger excels in close combat, applying conditions like bleeding and poison. The Staff provides ranged attacks and utility, perfect for managing groups with Wells. Each weapon complements the Necromancer’s dark magic, whether focusing on minion control or direct damage. For leveling, the Axe is often recommended for its raw power, while the Dagger offers versatility in applying conditions; The Staff shines in open-world scenarios, allowing you to maintain distance while utilizing area effects. Experimenting with these weapons helps tailor your playstyle, ensuring a smooth leveling experience in Guild Wars 2.

3.3 Gear Progression: Leveling to Endgame

When leveling your Necromancer, focus on equipping gear that balances Power, Precision, and Toughness for optimal damage and survivability. Early on, use crafted or dropped equipment with appropriate stats. As you progress, upgrade to exotic gear around levels 60-70, which provides significant boosts. For endgame content, transition to ascended gear, ensuring higher stat totals and bonus effects. Accessories like runes and sigils can further enhance your build, with options like the Superior Rune of the Necromancer for improved minion synergy. Always prioritize gear with condition damage if focusing on a bleed or poison build. Regularly updating your equipment ensures a smooth transition from leveling to challenging endgame activities.

Gameplay Strategies for Efficient Leveling

Focus on map completion and open-world activities, utilizing minions and wells effectively, and mastering traits and weapon choices for optimal progression.

4.1 Mastering Minion Builds for Open World

Minion builds are a cornerstone of Necromancer leveling, offering sustained damage and survivability in open-world content. Focus on unlocking and upgrading minions like the Lich and Bone Minions early, as they provide consistent DPS and crowd control. Pair these with Blood Magic traits to enhance your healing and minion survivability. Always prioritize corpse generation through skills like Death’s Charge to maintain minion numbers. In open-world combat, position your minions strategically to avoid unnecessary damage while focusing on your own attacks. Experiment with weapon choices like the staff or axe to complement your minion build. By mastering minion management, you’ll create a formidable force capable of dominating Tyria’s challenges with ease.

4.2 Effective Use of Wells in Combat

Wells are a powerful tool for Necromancers, providing area effects that can damage, condition, or support allies. Start by using Well of Suffering to apply consistent damage and Well of Darkness for crowd control and protection. Position wells strategically in combat zones to maximize their impact, ensuring they affect multiple enemies. Combine wells with minion builds for enhanced synergy, as minions can draw enemy attention while wells deal damage. Unlock traits like Dark Magic to increase well duration and damage. Experiment with different well rotations to adapt to various combat scenarios, making them a cornerstone of your open-world leveling strategy. Mastery of wells will elevate your Necromancer’s efficiency in both solo and group play.

4.3 Open World Leveling Tips and Tricks

Mastering open-world leveling as a Necromancer involves efficient map exploration and strategic skill usage. Focus on completing hero challenges, hearts, and dynamic events for rapid experience gain. Use minions to tank enemies while you deal damage from a safe distance. Position wells like Well of Suffering and Well of Darkness in high-traffic enemy areas to maximize their impact. Unlock Spectral Walk early for improved mobility and repositioning. Experiment with weapon swaps to adapt to combat situations, and prioritize area-of-effect skills for clearing clustered enemies. Keep your summoning skills refreshed and use crowd control to manage tougher foes. Remember to explore thoroughly, as discovery rewards significant XP. Adapt your build and strategies as you level to maintain efficiency and enjoyment in Tyria’s vast open world.

Transitioning to Endgame Builds

Transitioning to endgame builds requires refining your traits, optimizing gear, and mastering advanced strategies. Focus on maximizing damage output while maintaining survivability for challenging content like raids and dungeons.

5.1 Preparing for Endgame Content

Preparing for endgame content as a Necromancer involves optimizing your build for maximum efficiency. Focus on acquiring high-tier gear, such as exotic weapons and armor, to ensure survivability and damage output. Refine your traits to emphasize either damage or survivability, depending on your role. Practice advanced techniques like proper minion management and well placement to maximize your effectiveness in raids and dungeons. Additionally, familiarize yourself with endgame-specific skills and rotations to adapt to the increased difficulty. Finally, experiment with different builds to find the one that suits your playstyle best, ensuring you’re ready to tackle challenging content like fractals and world bosses.

5.2 Adjusting Traits and Skills for Max Damage

Maximizing damage as a Necromancer requires careful adjustment of traits and skills. Focus on traits like Spite, Soul Reaping, and Death Magic, which enhance your offensive capabilities. Prioritize skills that deal direct damage or amplify your minions’ effectiveness, such as Wells of Power and Blood is Power. Experiment with weapon combinations, as the staff, axe, or dagger can significantly impact your damage output. Ensure your skill bar includes high-damage abilities like Dark Frenzy or Corrupt Burst for burst damage. Finally, optimize your gear to favor power and precision, and consider swapping to a more aggressive build once comfortable with your rotation. This setup will ensure you deliver maximum damage in endgame content.

5.3 Gear Optimization for Endgame Performance

Optimizing your gear is crucial for peak endgame performance as a Necromancer. Focus on acquiring Exotic or Legendary weapons and armor with stat combinations like Power, Precision, and Vitality for raw damage and survivability. Ensure your gear is infused with the appropriate runes and sigils to enhance your abilities, such as the Rune of the Necromancer for improved minion damage or the Sigil of Draining for better energy management. Additionally, consider upgrading to high-tier trinkets and backpieces to maximize your damage output. Crafting or raiding for ascended gear is highly recommended for endgame content; Finally, experiment with infusions to further enhance your build’s effectiveness in challenging encounters.

Continue Reading

barber hairstyle guide

Barber hairstyles are a cornerstone of men’s grooming, blending classic cuts with modern trends. From fades to undercuts, these styles offer versatility, personalization, and timeless appeal;

1.1 Understanding the Basics of Barbering

Barbering begins with mastering essential tools like clippers, scissors, and razors. Fundamental techniques include fades, undercuts, and blunt cuts, requiring precision and adaptability to suit various hairstyles and hair types, forming the foundation for creating versatile and stylish looks.

1.2 The Importance of Choosing the Right Hairstyle

Selecting the right hairstyle enhances confidence, complements face shape, and suits hair type. It reflects personal style, boosts first impressions, and offers versatility for different occasions, ensuring a fresh, polished look tailored to individual preferences and lifestyle needs.

Popular Barber Hairstyles for Men

From sleek fades to stylish undercuts, modern barber styles offer a wide variety of options, blending classic cuts with contemporary trends for a fresh, personalized look.

2.1 Fade Hairstyles: From Low Taper to High Fade

Fade hairstyles are a popular choice, offering versatility and a clean look; The low taper fade transitions subtly, while the high fade creates a bold, modern aesthetic. Both styles can be paired with undercuts or pompadours, making them suitable for various face shapes and personal preferences. Regular maintenance ensures a sharp, fresh appearance.

2.2 Undercut and Its Variations (Classic, Skin Fade, Textured)

The undercut is a versatile style, offering classic, skin fade, and textured variations. The classic undercut pairs longer top hair with shaved sides, while the skin fade blends seamlessly into the skin. Textured undercuts add volume and dimension, making them ideal for various hair types and face shapes, ensuring a fresh, stylish look with minimal upkeep.

2.3 Pompadour and Quiff: Modern Takes on Classic Styles

The pompadour and quiff are timeless styles reimagined for modern men. The pompadour features voluminous, swept-up hair, while the quiff combines a side part with a textured finish. Both styles offer versatility, blending classic elegance with contemporary flair. They suit various face shapes and hair types, making them popular choices for those seeking a sophisticated yet trendy look with minimal effort.

Tools and Techniques for Barber Hairstyles

Essential tools like clippers, scissors, and razors are vital for crafting precise barber styles. Techniques such as fades and undercuts require skill and attention to detail.

3.1 Essential Tools: Clippers, Scissors, and Razors

Clippers are crucial for creating fades and undercuts, while scissors allow for precise trimming and styling. Razors add definition with clean lines, enabling barbers to craft modern and classic looks effortlessly.

3.2 Mastering Cutting Techniques (Blunt, Fade, and Textured Cuts)

Blunt cuts create sharp, clean lines, ideal for a neat look. Fade techniques offer precision, blending hair lengths seamlessly. Textured cuts add volume, enhancing hair’s natural movement. These methods require skill and attention to detail, allowing barbers to craft personalized, modern styles with versatility and expertise.

Maintenance and Care for Barber Hairstyles

Regular trims and proper grooming are essential to maintain barber hairstyles. Use styling products like pomades and gels to keep your look fresh and polished daily.

Touch-ups every 2-3 weeks prevent overgrowth, ensuring your style stays sharp. Pair with a consistent skincare routine for a complete, well-groomed appearance.

4.1 Tips for Keeping Your Hairstyle Fresh and Neat

Regular trims and touch-ups are crucial for maintaining a polished look. Use styling products like pomades or gels to define your style daily. Keep your scalp clean and moisturized to prevent dandruff. For fades, ensure consistent upkeep to avoid uneven growth. Brush or comb your hair regularly to maintain texture and prevent tangles. These simple habits will keep your barber hairstyle sharp and fresh.

4.2 Product Guide: Gels, Pomades, and Oils for Different Styles

Gels provide strong hold for sleek, defined looks, ideal for fades and undercut styles. Pomades add texture and shine, perfect for pompadours or quiffs. Oils moisturize and enhance natural texture, great for wavy or medium-length cuts. Choose products based on your hairstyle and desired finish to maintain a fresh, polished appearance every day.

Barber Shop Experience

A professional barbershop offers a unique, personalized experience. Skilled barbers provide tailored cuts and grooming, ensuring a fresh, stylish look that meets your individual preferences and needs.

5.1 What to Expect at a Professional Barbershop

At a professional barbershop, expect a welcoming atmosphere and skilled barbers who listen to your preferences. Services often include consultations, precise cuts, shaves, and styling. Many barbers use high-quality tools and techniques to ensure a polished look. Some shops offer additional touches like hot towels or neck trims for a premium experience.

5.2 How to Communicate with Your Barber for the Best Results

Clear communication is key to achieving your desired hairstyle. Be specific about the style, length, and any modifications. Bring reference images if helpful. Discuss your hair type, face shape, and lifestyle to ensure a personalized look. Asking questions and seeking maintenance tips can also enhance your experience and satisfaction with the final result.

Trends in Barber Hairstyles

Fades, undercuts, and mullets are dominating 2023, while modern twists like the mullet and mohawk fade are expected to trend in 2025, offering edgy, stylish options.

6.1 Latest Hairstyle Trends for 2023 and Beyond

In 2023, fades, undercuts, and textured crops are popular, while 2025 sees a rise in bold styles like the modern mullet and mohawk fade. These trends blend classic barber techniques with contemporary aesthetics, offering men versatile and edgy looks that stand out. Whether sleek or rugged, these styles cater to diverse preferences and face shapes.

6.2 Creative Variations: Mullet, Mohawk, and Box Braids

The modern mullet and mohawk fade offer edgy, bold looks, while box braids provide a unique, cultural-inspired style. These creative variations allow men to express individuality, blending traditional barber techniques with modern flair. Perfect for those seeking standout styles, these trends cater to adventurous personalities and diverse fashion tastes, adding a fresh twist to classic barbering.

Choosing the Right Hairstyle for Your Face Shape

Choosing the right hairstyle involves considering face shape and hair type. Round faces suit fades, while oval faces complement textured cuts. Square faces benefit from longer styles to balance features.

7.1 Hairstyles for Round, Oval, Square, and Triangular Faces

Hairstyles should complement face shapes. Round faces benefit from fades or undercuts to elongate. Oval faces suit most styles, like textured cuts with side parts. Square faces balance with softer styles, such as pompadours or quiffs. Triangular faces work well with volume on top and subtle undercuts for harmony.

7.2 Considering Hair Type: Thick, Thin, Wavy, and Straight Hair

Thick hair thrives with undercuts or fades to reduce bulk, while thin hair benefits from side parts or sleek styles for the illusion of thickness. Wavy hair shines with textured cuts and sea salt sprays, enhancing natural movement. Straight hair looks sharp with undercuts or fades, while lightweight products add definition without weight.

DIY Barbering Tips

Mastering DIY barbering involves investing in quality tools and practicing precision cuts. Start with small trims, use mirrors for visibility, and maintain clean, hygienic equipment for professional results.

8.1 How to Achieve Salon-Quality Cuts at Home

Achieving salon-quality cuts at home requires precision and the right tools. Start by sectioning your hair and using a comb guide for evenness. Use clippers for fades and scissors for detailing. Maintain clean lines, trim neckline neatly, and blend layers smoothly. Regular practice and patience will help refine your technique for professional-looking results without a trip to the barbershop.

8.2 Common Mistakes to Avoid While Cutting Your Own Hair

Common mistakes include uneven cuts from improper sectioning, insufficient mirror visibility, and cutting too much hair at once. Avoid applying too much tension, which can lead to pulling or unevenness. Not following natural hairlines can result in an unbalanced look. Use guides or consult tutorials to minimize errors and achieve a polished finish without professional assistance.

Barber Hairstyles for Different Occasions

Barber hairstyles offer versatility for every event, from sleek, formal looks to casual, party-ready styles. Choose a cut that matches your occasion, ensuring confidence and timeless appeal.

9.1 Formal and Business-Appropriate Hairstyles

For formal events, sleek side parts and polished undercuts are ideal. These styles exude professionalism and sophistication, perfect for business meetings or weddings. Pair with a trim beard for a refined look.

9.2 Casual and Party-Ready Barber Styles

Casual styles like fades and undercuts are perfect for relaxed outings. For parties, try bold options like mullets or mohawks. Add texture with styling products for a vibrant look that’s easy to maintain and turns heads at any event.

The Evolution of Barber Hairstyles

Barber hairstyles have transformed from classic cuts to modern innovations, reflecting cultural shifts and personalization trends. Today, they blend tradition with creativity, shaping men’s grooming culture globally.

10.1 Classic Cuts vs. Modern Innovations

Classic barber cuts, like the timeless side part and slicked-back styles, have evolved into modern innovations such as fades, undercuts, and textured designs. These updates blend traditional techniques with contemporary flair, offering men fresh looks while maintaining the essence of barbering’s heritage.

10.2 How Barbering Has Influenced Men’s Grooming Culture

Barbering has transformed men’s grooming by blending tradition with modern flair, fostering a culture of precision and style. Barbershops now serve as community hubs, offering more than just cuts—they provide shaves, beard styling, and personalized advice. This shift has elevated grooming standards, making barbering a cornerstone of men’s identity and confidence.

Barber Hairstyles for Different Hair Lengths

Barber hairstyles cater to all hair lengths, offering sleek fades for short hair, textured undercuts for medium, and stylish man buns or mullets for longer locks.

11.1 Short Hairstyles: Fade, Undercut, and Crop

Short hairstyles like fades, undercuts, and crops are timeless choices for men. Fades offer a clean, modern look with gradual length reduction, while undercuts provide versatility with contrasting lengths. Crops are practical, featuring a uniform cut with a slight texture. These styles suit various face shapes and hair types, making them ideal for those seeking low-maintenance yet stylish options.

11.2 Medium to Long Hairstyles: Man Bun, Mullet, and More

Medium to long hairstyles offer bold, eye-catching options for men. The man bun is sleek and sophisticated, while the mullet adds a rebellious edge. Other styles include braids and ponytails, perfect for those with thicker hair. These looks require regular maintenance but provide endless styling possibilities, making them great for confident individuals who want to stand out.

Barber hairstyles have evolved into a vibrant blend of classic and modern looks. From fades to mullets, these styles empower men to express their unique identity with confidence.

12.1 Final Tips for Rocking Your Barber Hairstyle

Confidence is key to pulling off any barber hairstyle. Regular trims and proper product use keep your look fresh; Experiment with trends but stay true to your style. Communicate clearly with your barber for a personalized cut that enhances your features. Own your look, and embrace the versatility barber styles offer for every occasion;

12.2 Staying Updated with the Latest Barbering Trends

To stay ahead, follow top barbers and fashion icons for inspiration. Trends evolve, blending classic cuts with modern twists. Regular trims and quality products keep your style fresh. Adapt to seasonal changes and experiment with bold looks like mullets or fades. Stay informed through social media and barbershop trends to embrace the latest innovations in men’s grooming.

Continue Reading

gm part number cross reference guide

The GM Part Number Cross Reference Guide simplifies finding compatible parts by mapping GM-specific numbers to aftermarket or OEM equivalents, ensuring accurate fitment and functionality․

1․1 Understanding the Importance of Part Number Cross-Referencing

Part number cross-referencing is essential for efficiently identifying compatible GM parts, ensuring accuracy in repairs and maintenance․ It helps avoid mismatches, reducing errors and saving time․ By mapping GM-specific part numbers to aftermarket or OEM equivalents, cross-referencing streamlines the search process․ This method is particularly valuable in the automotive industry, where precision is critical․ It also aids in overcoming obsolete or discontinued parts by finding suitable alternatives․ Effective cross-referencing enhances maintenance efficiency, reduces costs, and ensures vehicle performance remains optimal․ This process is indispensable for mechanics, DIYers, and suppliers seeking reliable solutions for GM vehicles․

1․2 Brief Overview of GM Parts and Their Interchangeability

GM parts are designed with interchangeability in mind, allowing compatibility across various models and years․ This ensures repairs and maintenance are cost-effective and efficient․ By referencing part numbers, users can identify suitable replacements, reducing the need for new components․ Websites like AutoZone simplify this process by providing detailed cross-reference data․ Suppliers also play a crucial role in maintaining interchangeability standards․ While many parts are interchangeable, variations in quality or specifications may exist, so verification is essential to ensure proper fitment and functionality․

How to Use a GM Part Number Cross Reference Guide

Enter the GM part number into a search engine or database to find compatible parts․ Tools like AutoZone or OEM catalogs simplify the process for quick results․

2․1 Step-by-Step Process for Finding Compatible Parts

To find compatible parts, start by identifying the GM part number from the vehicle or repair manual․ Next, use a search engine or a dedicated cross-reference tool like AutoZone or RockAuto․ Enter the part number into the search bar and review the results for exact matches or equivalents․ Ensure the parts fit your specific vehicle model and year․ Verify compatibility by checking the product descriptions or consulting with a parts specialist if needed․ This method ensures accurate and efficient part identification, saving time and reducing errors․

2․2 Tools and Resources for Effective Cross-Referencing

Effective cross-referencing relies on specialized tools and resources․ Online databases like AutoZone and RockAuto provide comprehensive part listings and compatibility checks․ GM’s official parts catalog is another invaluable resource, offering detailed part numbers and diagrams․ Additionally, search engines with advanced features can refine results using specific part numbers or vehicle details․ Manufacturer-specific tools, such as GM’s PartsPro, streamline the process by linking part numbers to exact applications․ Utilizing these tools ensures accuracy and efficiency, reducing errors and saving time when searching for compatible GM parts․

Common Challenges in Cross-Referencing GM Parts

Common challenges include part number misidentification, outdated databases, and limited access to legacy part information, complicating the cross-referencing process for GM parts․

3․1 Overcoming Part Number Misidentification

Part number misidentification is a common challenge in cross-referencing GM parts․ This often occurs due to similar numbers or outdated catalogs․ To overcome this, use cross-reference tools like AutoZone or GM’s VIN lookup․ Verify numbers across multiple sources and consult with experts or forums for confirmation․ Double-checking ensures accurate fitment and functionality, saving time and resources․ Additionally, leveraging advanced search techniques and manufacturer-specific systems can help reduce errors and improve precision in identifying the correct parts․

3․2 Dealing with Obsolete or Discontinued Parts

When GM parts become obsolete or discontinued, finding replacements can be challenging․ One effective strategy is to use cross-reference guides to identify equivalent or upgraded parts․ Additionally, consulting with suppliers or manufacturers can provide insights into alternative solutions․ Online databases and forums often list discontinued parts with compatible alternatives․ VIN lookups and part number verification tools can also help locate matching components․ In some cases, aftermarket providers offer rebuilt or remanufactured versions of discontinued parts, ensuring continued functionality; Regularly updating your cross-reference resources helps mitigate the risk of obsolescence and ensures access to necessary components․

Advanced Search Techniques for GM Parts

Use specific search engines and tools to refine your GM parts search․ Employ VIN decoding for precise matches and utilize advanced search operators for quicker results․

4․1 Using Search Engines Effectively

Maximizing search engines requires strategic techniques․ Use specific keywords like “GM part cross reference” or “interchangeable parts for GM․” Apply filters for year, make, and model to narrow results․ Utilize advanced search operators such as site: to search within trusted sites like AutoZone or RockAuto․ For example, typing site:rockauto․com GM part number can yield precise matches․ Additionally, employ boolean searches with terms like “AND” or “OR” to refine queries․ This method ensures you quickly locate accurate and compatible parts for your GM vehicle, saving time and reducing errors in your search process․

4․2 Leveraging Online Databases and Catalogs

Online databases and catalogs are indispensable tools for cross-referencing GM parts․ Platforms like AutoZone and RockAuto offer comprehensive part listings with search functionalities․ Enter a GM part number or description to find compatible alternatives․ Use filters for vehicle year, make, and model to refine results․ Many databases also provide diagrams and specifications to ensure accurate fitment․ Additionally, manufacturer-specific catalogs like AC Delco or Duralast can offer verified replacements․ These resources often include real-time inventory checks and pricing, making them essential for efficient part sourcing and ensuring you find the right component quickly and reliably․

The Role of Suppliers and Manufacturers in Cross-Referencing

Suppliers and manufacturers collaborate with GM to provide standardized part numbers and cross-reference data, ensuring accuracy and efficiency in part identification and ordering processes for users․

5․1 How Suppliers Provide Cross-Reference Information

Suppliers play a crucial role in providing cross-reference information by utilizing advanced tools like search engines and databases to map GM part numbers․ They use platforms such as AutoZone or specialized catalogs to ensure accuracy․ By inputting part numbers into these systems, suppliers generate detailed cross-reference guides, enabling users to find compatible parts efficiently․ Additionally, suppliers often employ APIs and integration tools to share data seamlessly with manufacturers and retailers․ This collaboration ensures that users can access up-to-date and reliable information, streamlining the parts identification process and enhancing overall customer satisfaction․

5․2 Manufacturer-Specific Cross-Referencing Systems

Manufacturers like GM often develop proprietary cross-referencing systems tailored to their specific part numbering structures․ These systems leverage extensive databases to map part numbers to equivalent or compatible alternatives․ By integrating with dealer networks and supplier catalogs, manufacturers ensure high accuracy and reduce errors․ Advanced algorithms validate compatibility across different vehicle models and production years․ Additionally, manufacturer-specific systems often include real-time updates, reflecting new releases or discontinued parts․ This centralized approach streamlines the identification process, making it easier for users to locate the correct parts efficiently․ Such systems are particularly valuable for maintaining consistency and reliability in aftermarket and OEM sourcing․

Future Trends in GM Part Number Cross-Referencing

Future trends include AI-driven algorithms enhancing cross-referencing accuracy and integration with global databases for real-time part compatibility updates, improving efficiency and user experience significantly․

6․1 The Impact of AI and Machine Learning

AI and machine learning are revolutionizing GM part cross-referencing by enhancing search accuracy and speed․ These technologies analyze vast databases to identify patterns and predict part compatibility, reducing errors․ AI-powered tools can learn from user searches, improving results over time․ Machine learning algorithms automatically update cross-reference data, ensuring users access the latest information․ This integration streamlines the process, making it easier for technicians and enthusiasts to find the right parts quickly․ As a result, AI and machine learning are set to transform the future of part number cross-referencing, offering unparalleled efficiency and precision․

6․2 Enhancements in Online Search and Database Integration

Advancements in online search and database integration are significantly improving the GM part number cross-reference process․ Enhanced algorithms now deliver more precise search results, reducing time spent hunting for parts․ Integrated databases ensure real-time updates, providing users with the most current information․ Additionally, improvements in search functionality allow for filtering by vehicle make, model, and year, narrowing results efficiently․ These upgrades enable seamless navigation and faster identification of compatible parts, benefiting both professionals and enthusiasts․ The integration of visual tools, like interactive diagrams, further enhances the user experience, making part identification more intuitive than ever․

Continue Reading

size guide for road bikes

Proper road bike sizing ensures optimal comfort, efficiency, and performance. Understanding frame size, standover height, and inseam helps riders select the right bike for their body proportions.

While size charts provide a general guide, personal comfort and test rides are crucial for the best fit, as body proportions and riding styles vary widely.

1.1 Why Proper Bike Size Matters

Proper bike size ensures a comfortable riding posture, maximizing power output and reducing fatigue. A well-fitted bike minimizes the risk of injury and enhances control, making long rides more enjoyable.

Incorrect sizing can lead to discomfort, poor performance, and increased strain on joints; Investing time in finding the right size ensures a safer and more efficient riding experience, tailored to your body proportions and riding style.

1.2 Overview of Road Bike Frame Sizes

Frame sizes typically range from 47cm to 63cm, measured from the bottom bracket to the top of the seat tube. Sizes are based on rider height and inseam, ensuring optimal standover clearance.

Compact or sloping frames offer a more comfortable fit for shorter riders, while taller riders benefit from traditional frame designs. Each size corresponds to specific tube lengths, ensuring a balanced geometry for efficient pedaling and handling.

How Road Bikes Are Measured

Frame size is measured from the bottom bracket to the top of the seat tube. Standover height and reach are also considered to ensure proper fit and comfort.

2.1 Understanding Frame Size Measurements

Frame size is typically measured from the center of the bottom bracket to the top of the seat tube. This measurement helps determine the bike’s proportions and fit for riders.

Standover height and reach are also considered, ensuring comfort and efficiency. Accurate measurements are crucial for optimal performance and long-term riding comfort.

2.2 Importance of Standover Height

Standover height measures the clearance between the rider and the bike’s top tube, ensuring safety and comfort. Proper clearance prevents discomfort and injury, especially in rough terrain.

A general rule is 1-2 inches of space for road bikes, allowing for optimal maneuverability and control while riding.

Factors Influencing Road Bike Size

Rider height, inseam, body proportions, and riding style significantly affect bike size. These factors ensure optimal fit, comfort, and performance for cyclists of all builds and preferences.

3.1 Rider Height and Inseam

Rider height and inseam are crucial for determining road bike size. A taller rider may require a larger frame, while inseam affects standover height and riding comfort. Proper measurement ensures the bike fits the rider’s body proportions, optimizing performance and reducing discomfort. Accurate measurements are essential for selecting the right size, as they directly impact the cycling experience and overall efficiency.

3.2 Body Proportions and Riding Style

Body proportions, such as torso length and arm span, influence handlebar fit and riding comfort. Riders with longer torsos may prefer a shorter stem, while those with shorter torsos might opt for a longer one. Riding style also plays a role, as aggressive riders may favor a smaller frame for better handling, while endurance riders might prefer a larger frame for comfort during long rides.

Road Bike Size Charts

Road bike size charts are based on rider height and inseam, providing a general frame size guide. While helpful, they may vary by manufacturer, so always check specific guides.

4.1 Standard Size Charts for Adults

Standard size charts for adults typically categorize road bikes based on rider height and inseam. Frames are usually measured in centimeters, ranging from 47cm to 63cm. These charts provide a general guide, but variations exist between manufacturers. For example, a 54cm frame might suit a rider with a 30-inch inseam and 5’8″ height. While charts are helpful, personal fit and test rides are essential for optimal comfort and performance.

4.2 Size Charts for Different Manufacturers

Different manufacturers often have unique size charts tailored to their bike models. While some use numeric sizing, others employ proportional systems like Small, Medium, or Large. For example, a 54cm frame from one brand may not match another’s. Always consult the specific manufacturer’s chart, as variations in frame geometry and design can affect fit. This ensures the best alignment with your body proportions and riding style for optimal comfort.

Sizing Up or Down

Sizing up offers stability and aerodynamics, while sizing down provides agility. Both options depend on rider preferences, body proportions, and riding style for optimal performance.

5.1 Pros and Cons of Sizing Up

Sizing up offers a more stretched riding position, enhancing aerodynamics and stability at high speeds. However, it can compromise handling agility and may feel too large for shorter riders, potentially causing discomfort. Ensuring proper fit is crucial to balance performance and comfort.

5.2 Pros and Cons of Sizing Down

Sizing down provides a more compact and maneuverable bike, ideal for shorter riders or those prioritizing agility. However, it can lead to a less aerodynamic position and reduced leg room, potentially causing discomfort on long rides. Test riding is essential to ensure the smaller size doesn’t compromise performance or comfort.

The Role of a Bike Fitter

A professional bike fitter assesses rider posture, flexibility, and riding style to optimize bike fit, ensuring comfort and performance through precise adjustments to handlebars, seat height, and more.

6.1 What a Professional Bike Fitting Entails

A professional bike fitting involves a detailed assessment of the rider’s body proportions, flexibility, and riding style. The fitter uses specialized tools to measure key aspects such as saddle height, handlebar reach, and cleat alignment. They also consider the rider’s comfort and performance goals to make precise adjustments, ensuring optimal ergonomics and efficiency on the bike.

6.2 Benefits of a Custom Bike Fit

A custom bike fit enhances comfort, performance, and efficiency by tailoring the bike to the rider’s unique body proportions and needs. It reduces discomfort, prevents injuries, and optimizes power output. A proper fit also improves handling and control, making long rides more enjoyable. Additionally, it helps maintain consistent riding posture, reducing strain and enhancing overall cycling satisfaction.

Test Riding a Road Bike

Test riding helps ensure the bike fits comfortably and performs well. Pay attention to handling, saddle comfort, and reach to the handlebars.

Adjust the bike during the test ride to achieve optimal fit, ensuring a comfortable riding position for both short and long distances.

7.1 What to Look for During a Test Ride

During a test ride, assess comfort, handling, and ergonomics. Check if the saddle height and handlebar reach feel natural, and ensure proper leg extension.

Pay attention to how the bike responds to steering and braking. Verify there’s adequate standover clearance and the bike feels balanced at various speeds.

Make sure the riding position doesn’t cause strain and aligns with your preferred style, whether upright or aggressive, ensuring long-term comfort and performance.

7.2 Adjusting the Bike for Optimal Fit

Adjusting the bike involves fine-tuning saddle height, handlebar reach, and cleat position for optimal comfort and efficiency.

Ensure the saddle height allows a slight bend in the knee at the pedal’s lowest point, improving power and reducing strain.

Tweak handlebars to align with your riding style, and position cleats for proper foot alignment, enhancing control and reducing fatigue during rides.

Common Mistakes to Avoid

Relying solely on height charts can lead to poor fit, as body proportions vary.
Ignoring personal comfort preferences often results in discomfort during long rides.

8.1 Relying Solely on Height Charts

Relying only on height charts is a common mistake, as it doesn’t account for variations in body proportions, such as inseam, torso length, and arm span. While height provides a baseline, it’s essential to consider individual differences, as two riders of the same height may require different frame sizes. Manufacturers also vary in sizing standards, so a bike that fits one brand may not fit another. Ignoring these factors can lead to discomfort and suboptimal performance, emphasizing the need for a more holistic approach to sizing.

8.2 Ignoring Personal Comfort Preferences

Ignoring personal comfort preferences can lead to a poor riding experience. While size charts are a guide, individual comfort varies. Riders may prefer a more relaxed or aggressive position, influencing handlebar height and saddle choice. Test rides are essential to ensure the bike feels right, as personal ergonomics and riding style play a significant role in long-term comfort and performance. Comfort should never be compromised for perceived sizing norms.

Maintenance and Fit Adjustments

Regular bike maintenance ensures consistent sizing and performance. Adjusting handlebars and seat height can fine-tune comfort, while proper care maintains optimal fit over time.

9.1 Adjusting Handlebars and Seat Height

Adjusting handlebars and seat height is crucial for optimal comfort and performance. Handlebars can be raised or lowered to suit riding posture, while seat height should allow a 25-30° knee bend at the pedal’s lowest point. Proper adjustments prevent discomfort and improve efficiency. Use tools like Allen keys for precise tweaks and test the fit during short rides to ensure ideal positioning.

9.2 Regular Maintenance for Sizing Consistency

Regular maintenance ensures consistent bike sizing by keeping components in optimal condition. Check and tighten bolts, lubricate moving parts, and inspect wear on tires and chains. Cleanliness and proper storage prevent rust and corrosion, maintaining precise fit and performance over time. Routine checks help identify adjustments needed, preserving the bike’s fit and functionality for a comfortable, efficient ride every time.

Personalizing Your Road Bike

Personalizing your road bike ensures a tailored fit for comfort and performance. Adjustments include optimizing saddle height, handlebar width, and stem length to suit your body and riding style.

10.1 Choosing the Right Saddle

Choosing the right saddle is crucial for comfort and performance. Consider your body weight distribution, riding style, and personal comfort preferences. Saddles come in various widths and shapes, catering to different rider needs.

Look for materials like gel or foam for cushioning and cutouts to relieve pressure. Test rides and professional fittings can help determine the ideal saddle for your road bike experience.

10.2 Optimizing Handlebar Width and Reach

Optimizing handlebar width and reach ensures a comfortable and efficient riding position. Handlebar width should match your shoulder width for natural posture, while reach affects how stretched you feel. A proper fit prevents discomfort and fatigue, enhancing performance. Test different handlebars and adjust based on personal preference and riding style for the best experience.

Proper bike sizing is crucial for optimal performance, efficiency, and long-term comfort, ensuring a more enjoyable and safe riding experience for all riders on the road.

11.1 Final Tips for Finding Your Perfect Fit

Combine size charts with personal measurements like inseam and torso length for accuracy. Test rides are essential to ensure comfort and control. Consider consulting a professional fitter for precise adjustments. Start with a slightly larger frame for comfort, then fine-tune handlebars and saddle height. Remember, the right fit enhances performance, reduces fatigue, and prevents discomfort during long rides.

11.2 Importance of Long-Term Comfort

Long-term comfort is essential for enjoyable and injury-free riding. A well-fitted bike prevents chronic back pain, neck strain, and hand numbness, common issues from poor sizing. Proper saddle height and handlebar reach are essential to maintain optimal posture. Prioritizing comfort enhances performance and keeps you riding longer with enthusiasm. Don’t overlook the importance of a comfortable fit; it’s key to a satisfying cycling experience.

Further Resources

Explore detailed size guides on websites like TCS Velocorner and Sigma Sports for precise measurements and expert tips. These resources offer comprehensive charts and fitting advice.

12.1 Recommended Size Guides Online

Websites like TCS Velocorner and Sigma Sports provide detailed road bike size charts, catering to various rider heights and inseams. These guides include tips on measuring standover height and frame size accurately. For personalized recommendations, manufacturers often offer specific size charts tailored to their bike models. Additionally, forums and cycling communities share real-world experiences, helping riders make informed decisions. Online tools and calculators are also available to streamline the process.

12.2 Suggested Reading on Bike Fit

Explore detailed guides from TCS Velocorner and Sigma Sports for precise size charts and measurement tips. These resources offer insights into frame size, standover height, and inseam calculations, helping cyclists find their ideal fit. Additionally, online forums and cycling communities share real-world experiences, providing practical advice and recommendations for personalizing your road bike setup. These materials are invaluable for making informed decisions tailored to individual needs and preferences.

Continue Reading

cataclysm assassination rogue guide

The Assassination Rogue is a deadly specialization in Cataclysm Classic, excelling at dealing high burst damage and managing cooldowns effectively. Known for their lethal precision and poison expertise, they thrive in both PvE and PvP, making them a versatile and powerful choice for players seeking a challenging yet rewarding playstyle.

Overview of the Assassination Rogue Specialization

The Assassination Rogue specialization focuses on dealing massive burst damage through a combination of poisons, cooldowns, and precise ability rotations. This spec excels at single-target DPS, making it ideal for raid encounters and PvP. Assassination Rogues rely on generators like Sinister Strike to build combo points, which are then spent on devastating finishers such as Eviscerate. Their mastery of poisons enhances damage output and adds utility, making them a formidable and versatile choice for players seeking high damage potential in Cataclysm Classic.

Viability in Cataclysm Classic

Assassination Rogues remain a viable and competitive specialization in Cataclysm Classic, offering exceptional single-target DPS and burst damage potential. Their ability to apply debilitating poisons and manage cooldowns effectively makes them a valuable asset in both PvE and PvP. While they may lack the AoE capabilities of other specs, their focused damage output and utility through abilities like Master Poisoner ensure they are a strong choice for players seeking a balanced and engaging playstyle in Cataclysm Classic.

Key Features and Strengths

Assassination Rogues excel at delivering high burst damage and exceptional single-target DPS through precise rotations and cooldown management. Their mastery of poisons enhances damage output and provides utility, while abilities like Vendetta and Cold Blood amplify their lethal potential. The spec’s reliance on combo points and finishers rewards skillful play, making it a rewarding choice for experienced players. Additionally, the Master Poisoner talent further solidifies their role as a formidable damage dealer in both PvE and PvP scenarios.

Race Selection for Assassination Rogue

Race selection significantly impacts an Assassination Rogue’s performance in Cataclysm Classic. Trolls, Orcs, and Goblins are top choices, offering racial abilities like Berserking, Blood Fury, and Time is Money.

Best Races for Assassination Rogue

Trolls, Orcs, and Goblins are the optimal races for Assassination Rogues in Cataclysm Classic. Trolls benefit from Berserking, increasing attack speed, while Orcs leverage Blood Fury for burst damage. Goblins gain Time is Money, boosting movement speed and haste. These racial traits enhance DPS and mobility, making them top choices for maximizing damage output in PvE and PvP scenarios.

Other races, like Humans or Undead, are viable but lack the direct damage-boosting abilities of the aforementioned races, making Trolls, Orcs, and Goblins the most popular picks for Assassination Rogues.

Racial Abilities and Their Impact

Troll’s Berserking boosts attack speed, enhancing DPS during critical moments. Orc’s Blood Fury provides a significant damage increase, perfect for burst phases. Goblin’s Time is Money improves mobility and haste, aiding in positioning and cooldown management. These abilities synergize with Assassination’s high burst potential, making each race uniquely advantageous in specific scenarios, whether in PvE or PvP, allowing players to tailor their playstyle to their racial benefits.

Talent Builds and Glyphs

Optimal PvE builds focus on talents like Ruthlessness, Venomous Wounds, and Deadly Momentum, while glyphs such as Vendetta, Sprint, and Eviscerate enhance burst damage and mobility.

Optimal Talent Build for PvE

The optimal PvE talent build for an Assassination Rogue in Cataclysm Classic focuses on maximizing burst damage and sustain. Key talents include Ruthlessness (increases critical strike chance), Venomous Wounds (converts attack power into damage over time), and Deadly Momentum (reduces Eviscerate’s cost). These talents synergize with racial abilities like Blood Fury (Orc) or Berserking (Troll) to enhance damage output. This build ensures high single-target damage while maintaining mobility and cooldown efficiency in raids and dungeons.

Prime and Secondary Glyphs

For an Assassination Rogue in Cataclysm Classic, prime glyphs are crucial for maximizing damage output. Glyph of Vendetta enhances your Vendetta cooldown, increasing damage dealt. Glyph of Eviscerate boosts the ability’s damage by 10%, while Glyph of Sprint improves mobility. Secondary glyphs like Glyph of Poisons and Glyph of Blurred Speed provide utility, reducing poison application time and increasing movement speed while stealthed. These glyphs optimize both damage and survivability for PvE encounters.

Rotation and Gameplay Mechanics

Builder abilities like Sinister Strike generate combo points, while Eviscerate serves as the primary finisher for high damage. Cooldowns like Vendetta and Cold Blood are used strategically to burst damage targets, ensuring optimal damage output.

Builder and Finisher Abilities

Builder abilities, such as Sinister Strike and Revealing Strike, generate combo points while applying debilitating effects. These are alternated with finishers like Eviscerate and Recuperate to maximize damage output. Eviscerate deals massive damage based on combo points, making it the primary finisher. Recuperate not only heals but also increases energy regeneration, promoting sustained damage. Properly alternating builders and finishers ensures high, consistent DPS while maintaining resource efficiency and poison uptime in combat scenarios.

Cooldown Management

Effective cooldown management is crucial for maximizing damage output. Vendetta increases target damage by 20% for 30 seconds, ideal for high-priority enemies. Cold Blood enhances Eviscerate or Slice and Dice, delivering burst damage. Adrenaline Rush boosts energy regeneration, enabling rapid combo point generation. Timing these cooldowns with Tricks of the Trade and high-damage periods ensures optimal DPS. Proper rotation of these abilities elevates the Rogue’s lethality in both single-target and multi-target scenarios, making them a formidable presence in any raid or dungeon setting.

Professions and Consumables

Professions like Engineering and Jewelcrafting provide critical enhancements, while enchants and consumables such as Flask of the Wind and Dragonfin Filet boost DPS, ensuring peak performance in raids and dungeons.

Best Professions for Assassination Rogue

The best professions for an Assassination Rogue in Cataclysm Classic are Engineering and Jewelcrafting. Engineering provides access to powerful glove enchants like Hyperspeed Accelerators, significantly boosting attack speed. Jewelcrafting allows crafting of high-quality gems, enhancing key stats like agility and haste. Other viable options include Enchanting for weapon enchants, Blacksmithing for socketing bonuses, and Alchemy or Herbalism for self-sufficient consumable production. These professions complement the Rogue’s gameplay, enhancing damage output and versatility in raids and dungeons.

Consumables and Buffs

For optimal performance, Assassination Rogues rely on potent consumables and buffs. Use Elixir of Mastery or Potion of Speed to enhance agility and attack speed during critical moments. Food buffs like Agility-boosting dishes or Pandaren recipes provide sustained benefits; Additionally, utilize Flask of the Dragonhawk for increased agility and attack power over time. Don’t forget profession-specific consumables, such as Enchanting runes or Leatherworking drums, to further amplify your damage output in raids and dungeons.

Gear and Optimization

Gear and optimization are crucial for maximizing an Assassination Rogue’s potential. Focus on acquiring BiS items, optimizing gems, and applying enchants to enhance agility and attack power, ensuring peak performance in raids and dungeons.

BiS (Best in Slot) Gear

Acquiring BiS gear is essential for optimizing your Assassination Rogue’s performance. For Cataclysm Classic, focus on obtaining items with high agility and attack power. Weapons like Dragonwrath, Tarecgosa’s Rest and Ultraxion’s Nullifier are top-tier choices. Prioritize leather armor pieces such as Hide of the Blooded and Leggings of the Corrupted Waters. Accessories like Ring of the Ravenous Dragon and Will of the Unwavering also provide significant boosts. Always aim for epic items from raids and heroic dungeons to ensure maximum damage output.

Gems and Enchants

Optimizing your Assassination Rogue’s gear with the right gems and enchants is crucial for maximizing damage output. Prioritize agility gems like Pandia’s Tear or Shadow Sapphire in all available sockets. For enchants, Enchant Gloves ⎻ Crusher or Enchant Gloves ⎻ Healer’s boosts attack power, while Enchant Boots ⎯ Minor Speed enhances mobility. Consider Enchant Chest ⎯ Mighty for increased health and Enchant Shoulder ⎻ Greater Glide for improved movement speed. Ensure all slots are optimized to enhance agility and attack power for peak performance.

Poisons and Their Usage

Poisons are a cornerstone of the Assassination Rogue’s toolkit, enhancing damage output and providing utility. They include Deadly Poison, Wound Poison, and Crippling Poison, each serving unique roles in combat scenarios.

Types of Poisons

Assassination Rogues utilize three primary poisons: Deadly Poison, Wound Poison, and Crippling Poison. Deadly Poison deals consistent damage over time, while Wound Poison reduces enemy healing. Crippling Poison slows targets, enhancing crowd control. Each poison serves distinct roles, from raw damage to utility, allowing Rogues to adapt to various combat situations and maximize their effectiveness in both PvE and PvP scenarios.

Poison Application Strategies

Assassination Rogues must strategically apply poisons to maximize damage and utility. Use Deadly Poison for consistent damage, Wound Poison to hinder healing, and Crippling Poison for crowd control. Apply poisons before combat to ensure they’re active throughout the fight. Refresh poisons during cooldowns like Vendetta to maintain damage output. Timing poison applications with finishers like Eviscerate or Dispatch amplifies their effectiveness, ensuring optimal DPS in PvE and PvP scenarios.

Mastering the Assassination Rogue in Cataclysm Classic requires skill and strategy but offers high rewards. With proper rotation, cooldown management, and poison use, this specialization excels in endgame content, providing both viability and enjoyment for experienced players seeking a challenging yet rewarding playstyle.

Final Tips for Mastering Assassination Rogue

To excel as an Assassination Rogue in Cataclysm Classic, focus on mastering your rotation, cooldowns, and poison management. Always prioritize Vendetta and Cold Blood on high-priority targets for maximum damage. Optimize your poison application to maintain Deadly Poison stacks and use Envenom when combo points are high. Gear optimization is crucial, so focus on Agility and Haste. Practice your cooldown management during raids to maximize burst damage. Lastly, stay adaptable and adjust your strategies based on the encounter mechanics to ensure peak performance.

Endgame Viability and Enjoyment

Assassination Rogues remain highly viable in Cataclysm Classic endgame content, offering strong single-target DPS and burst damage. Their unique playstyle, combining poison management and cooldowns, provides a challenging yet rewarding experience. Many players enjoy the complexity and satisfaction of executing high-damage rotations effectively. In raids, Assassination Rogues are particularly valuable for their ability to deliver consistent damage while maintaining high mobility and utility. This specialization is ideal for players seeking a dynamic and engaging endgame experience in Cataclysm Classic.

Continue Reading

screw diameter guide

This guide provides essential insights into screw diameter, a critical factor in ensuring proper fit and function. Understanding screw diameter helps in selecting the right size for optimal performance, preventing issues like loose joints or material damage. It is a fundamental aspect of mechanical design, engineering, and construction, ensuring proper stress distribution and joint integrity.

1.1 What is Screw Diameter?

Screw diameter refers to the measurement of a screw’s width, typically indicating the major diameter of the screw thread. It is a critical dimension that ensures proper fit and function in various applications. Understanding screw diameter is essential for selecting the appropriate size, preventing issues like loose joints or material damage. It is fundamental in mechanical design and engineering, ensuring proper stress distribution and joint integrity.

1.2 Importance of Understanding Screw Diameter

Understanding screw diameter is crucial for ensuring the structural integrity and functionality of assembled components. Proper sizing prevents issues like joint loosening or material splitting, enhancing safety and reliability. It also facilitates standardization, making tools and parts interchangeable. Additionally, selecting the right diameter optimizes cost by preventing material waste and potential repairs. It’s essential for accommodating environmental conditions and ensuring durability across various applications.

Types of Screws and Their Diameters

Machine screws, wood screws, self-tapping screws, and lag screws each have distinct diameters suited for their specific applications, ensuring proper fit and performance in various tasks.

2.1 Machine Screws

Machine screws are versatile fasteners used in machinery and metal fabrication. They come in standardized diameters, typically measured in inches or millimeters. Common sizes range from #6 to 1/2″ or M3 to M12. The diameter determines the screw’s strength and suitability for specific applications. Choosing the correct size ensures proper fit, preventing damage or loosening. Proper diameter selection is critical for structural integrity and safety in load-bearing applications.

2.2 Wood Screws

Wood screws are specifically designed for use in wood and feature a coarse thread for better grip. They are available in various diameters, typically ranging from #6 to 1/4″ or M3 to M6 in metric sizes. The diameter choice depends on the wood thickness and load-bearing requirements. Proper sizing ensures secure fastening without splitting the wood, making them ideal for furniture, decking, and other woodworking projects; Correct diameter selection is crucial for strength and durability.

2.3 Self-Tapping Screws

Self-tapping screws are designed to create their own threads in materials like metal, plastic, or drywall. They feature a sharp point and a flute to remove material during installation. Diameters typically range from #6 to 1/4″ or M3 to M6 in metric sizes. These screws are ideal for materials without pre-drilled holes, offering convenience and efficiency in various applications. Proper sizing ensures secure fastening without causing material damage.

2.4 Lag Screws

Lag screws are large, heavy-duty fasteners with coarse threads, designed for securing heavy loads. They typically range in diameter from 1/4″ to 1″ (M6 to M24 in metric). Often used in construction, they are ideal for wood, metal beams, and decking. Their long lengths, up to 12 inches, and robust design ensure a strong hold. Made from durable materials like steel or stainless steel, lag screws are reliable for load-bearing applications, providing a secure and stable connection with minimal shifting.

Measurement Standards for Screw Diameter

Standardized screw diameter measurements ensure compatibility and reliability. Using tools like calipers or screw gauges, precise sizing is achieved, with thread pitch closely related to diameter size.

3.1 Understanding Screw Gauge Systems

Screw gauge systems are standardized methods for measuring screw diameters, ensuring compatibility and proper fit. They involve tools like calipers or screw diameter gauges, which measure the major and minor diameters of threads. These systems are crucial for maintaining precision in manufacturing and assembly. Both metric and imperial systems are widely used, with thread pitch closely tied to diameter size. Understanding these gauges ensures accurate measurements, preventing assembly issues and material damage.

3.2 Metric vs. Imperial Measurements

Metric and imperial systems are the two primary standards for measuring screw diameters. The metric system uses millimeters (mm), while the imperial system uses inches. Both systems have standardized thread pitches, with metric threads typically finer than imperial ones. Understanding the differences is crucial for compatibility and functionality. Conversion factors and charts are essential tools for ensuring accuracy when working across systems. Proper measurement ensures optimal performance and prevents assembly issues.

3.3 Thread Pitch and Its Relation to Diameter

Thread pitch, the distance between consecutive threads, directly influences screw diameter selection. A finer pitch increases the number of threads per inch, improving holding power in softer materials. Coarser pitches are ideal for thicker materials, reducing the risk of stripping. Proper alignment between pitch and diameter ensures optimal performance, preventing over-tightening and material damage. Understanding this relationship is vital for selecting screws that meet specific application demands and ensure structural integrity.

How to Choose the Right Screw Diameter

Selecting the right screw diameter involves considering material thickness, load-bearing requirements, and environmental factors to ensure optimal performance and durability in various applications.

4.1 Material Thickness and Screw Size

Material thickness plays a crucial role in determining the appropriate screw diameter. A screw must be long enough to securely fasten materials without protruding excessively. The diameter should match the material’s density to prevent splitting or cracking. For example, thicker screws are often used in denser materials like wood, while thinner screws suit softer or thinner materials. Proper alignment ensures even distribution of force, enhancing stability and longevity.

4.2 Load-Bearing Capacity and Diameter

The load-bearing capacity of a screw is directly influenced by its diameter. A larger diameter generally increases strength and resistance to shear forces. Thicker screws can handle heavier loads without deforming, making them ideal for structural applications. Material strength and thread design also play roles, but diameter remains a primary factor. Selecting the right diameter ensures the screw can safely support the intended weight without risking failure or compromising the structure’s integrity.

4.3 Environmental Factors Affecting Screw Choice

Environmental factors like humidity, temperature, and exposure to chemicals can significantly impact screw performance. Corrosion resistance is crucial in moist or salty environments, often requiring coated or stainless steel screws. Extreme temperatures can alter material properties, affecting torque and durability. Outdoor applications may demand weather-resistant materials to prevent rust and ensure longevity. Proper selection based on environmental conditions is vital for maintaining structural integrity and functionality over time.

Applications of Different Screw Diameters

Different screw diameters are used across industries, from construction to electronics, ensuring strength and precision. Each diameter serves specific needs, optimizing performance in diverse applications.

5.1 Construction and Building

In construction, screw diameters play a crucial role in ensuring structural integrity. Larger diameters are often used for heavy-duty applications, such as anchoring beams or securing metal frames, while smaller diameters are suitable for lighter tasks like assembling prefabricated components. The correct screw diameter ensures proper load distribution, preventing loosening or material damage. This is vital for safety and durability in buildings and infrastructure projects, where stability is paramount.

5.2 Automotive Industry

In the automotive industry, screw diameter selection is critical for ensuring vehicle safety and performance. Different components, such as engine parts or chassis assemblies, require specific screw sizes to withstand stress and vibration. Proper diameter choice prevents mechanical failure and ensures reliability. Automotive manufacturers adhere to strict standards, making screw diameter accuracy essential for maintaining vehicle integrity and passenger safety while optimizing cost and efficiency in production.

5.3 Aerospace Engineering

In aerospace engineering, screw diameter accuracy is critical for ensuring structural integrity and safety in aircraft and spacecraft components. High-stress environments demand precise sizing to maintain durability and resistance to harsh conditions. The aerospace industry relies on screws with specific diameters to minimize weight while maximizing load-bearing capacity. Corrosion-resistant materials and exact tolerances are essential, making screw diameter selection a vital step in aircraft and spacecraft design.

5.4 Electronics and Precision Devices

In electronics and precision devices, screw diameter plays a crucial role in ensuring proper assembly and functionality. Miniaturization in electronics demands precise screw sizing to fit compact designs. Tight tolerances are essential to prevent electrical shorts or mechanical failures. Screws in PCBs, connectors, and electronic housings must be selected carefully to maintain performance and durability. The right diameter ensures secure connections and withstands thermal and mechanical stresses in high-tech applications.

Screw Diameter and Performance

Screw diameter significantly impacts performance, affecting torque and driving force, durability and longevity, and cost considerations. Proper sizing ensures optimal load distribution and material integrity, preventing premature wear and failure.

6.1 Torque and Driving Force

The screw diameter directly influences the torque and driving force required for secure fastening. A larger diameter generally allows for higher torque capacity, ensuring better grip and reduced risk of stripping. Conversely, smaller diameters may require less force but can be more prone to over-tightening issues. Proper alignment and material compatibility are crucial to maximize efficiency and prevent premature wear. Balancing these factors ensures reliable performance in various applications.

6.2 Durability and Longevity

Screw diameter plays a significant role in determining the durability and lifespan of a fastened joint. Larger diameters typically offer greater strength and resistance to wear, while smaller diameters may compromise longevity. Environmental factors, such as moisture and temperature fluctuations, can also affect durability. Choosing the right diameter ensures optimal performance and minimizes the risk of premature failure. Proper material selection further enhances longevity, making it a critical consideration in design and application.

6.3 Cost Considerations

Screw diameter directly impacts project costs, as larger screws are generally more expensive. Material thickness and load-bearing requirements often dictate diameter size, influencing budget decisions. Environmental factors like corrosion resistance may necessitate specialized coatings, adding to expenses. Balancing cost and performance is crucial, as oversizing screws can waste resources, while undersizing may lead to premature failure and repair costs. Optimal diameter selection ensures both cost-efficiency and reliability.

Tools and Techniques for Measuring Screw Diameter

Calipers and screw diameter gauges are essential tools for accurate measurements. They ensure precise sizing, crucial for proper fit and functionality in various applications.

7.1 Using Calipers for Accurate Measurement

Calipers are the primary tool for measuring screw diameter, offering precision and reliability. They can measure both the outer diameter of the screw head and the thread pitch. Digital calipers provide accurate readings, while Vernier calipers are ideal for detailed measurements. Proper calibration and technique ensure consistent results, making calipers indispensable for ensuring screws fit correctly in their applications.

7.2 Screw Diameter Gauges and Their Use

Screw diameter gauges are specialized tools designed to measure and verify screw dimensions accurately. They are often used in quality control to ensure screws meet specified tolerances. These gauges come in various types, including go/no-go gauges, which check if the screw fits within acceptable limits. Regular use of screw diameter gauges helps maintain precision and consistency in manufacturing and assembly processes, ensuring high-quality outcomes and reducing defects.

Common Issues with Screw Diameter

Incorrect screw diameters can lead to improper fit, reduced performance, and potential material damage. Understanding these issues is crucial for ensuring reliability and safety in applications.

8.1 Diameter Mismatch and Its Consequences

A mismatch in screw diameter can lead to loose joints, reduced structural integrity, and material damage. If the screw is too small, it may not hold properly, while an oversized screw can split materials. This mismatch often results in reduced performance, safety hazards, and premature wear. Proper measurement and selection are critical to avoid these issues and ensure reliable functionality in any application.

8.2 Stripping and Over-Tightening

Stripping occurs when the screw head becomes damaged, making it difficult to turn or remove. Over-tightening can lead to thread damage or material deformation. Both issues compromise the screw’s hold, reducing its effectiveness. Stripping and over-tightening often result from using the wrong tools or applying excessive force. Proper screwdriving techniques and torque control are essential to prevent these common problems, ensuring long-term reliability and safety in applications.

This guide has provided a comprehensive overview of screw diameter, emphasizing its importance in design and functionality. Proper understanding ensures optimal performance, safety, and durability across applications.

9;1 Summary of Key Points

Understanding screw diameter is crucial for optimal performance and safety. Proper measurement, selection, and application ensure durability and functionality. Material thickness, load-bearing capacity, and environmental factors influence choices. Different industries, from construction to aerospace, rely on precise diameters for reliability. Tools like calipers and gauges aid accuracy, while addressing issues like mismatch and stripping ensures longevity. Selecting the right screw diameter is essential for successful projects and maintained integrity across applications.

9.2 Final Tips for Working with Screw Diameters

Always measure accurately using calipers or gauges to ensure the correct diameter. Refer to standards like ISO or ANSI for guidance. Consider material thickness and load-bearing needs when selecting screws. Avoid over-tightening to prevent stripping or damage. Store screws properly to maintain quality and prevent rust. Consult manufacturer guidelines for specific applications. Proper handling ensures optimal performance and longevity in any project.

Additional Resources

Explore manufacturer websites, technical manuals, and online forums for detailed guides. Industry standards like ISO and ANSI provide valuable references. Online courses and tutorials offer in-depth training.

10.1 Recommended Tools for Screw Measurement

Accurate measurement is crucial for screw diameter assessment. Calipers and micrometers are essential for precise diameter and thread pitch measurements. Screw diameter gauges ensure quick verification of size and fit. Digital measuring tools offer high precision and ease of use. Thread pitch gauges help verify the spacing between threads. These tools are indispensable for ensuring accuracy and consistency in screw diameter evaluation, especially in industrial and engineering applications.

10.2 Further Reading and References

For deeper understanding, consult ASME and ISO standards on screw diameters. Engineering handbooks and manufacturer catalogs provide detailed specifications. Online forums and tutorials offer practical insights. Academic articles on mechanical design and materials science are valuable resources. Additionally, industry-specific guides and technical manuals can enhance your knowledge of screw diameter applications and measurements, ensuring a comprehensive understanding of the subject.

Continue Reading

re revelations trophy guide

Resident Evil Revelations Trophy Guide Overview

This guide provides a comprehensive overview of all 56 trophies in Resident Evil Revelations, including 1 platinum, 2 gold, 5 silver, and 48 bronze trophies.

Earning the platinum trophy requires approximately 70 hours and is considered moderately challenging, with detailed tips for both campaign and Raid Mode achievements.

Players can unlock story-related trophies in a single playthrough, while hidden challenges and collectibles add depth to the completion journey.

The guide covers hand print locations, difficulty tips, and strategies for 100% completion, ensuring a smooth path to achieving all trophies.

Total Trophies and Difficulty

Resident Evil Revelations features a total of 56 trophies, including 1 platinum, 2 gold, 5 silver, and 48 bronze trophies. Earning the platinum trophy, which requires obtaining all other trophies, is estimated to take around 70 hours and is considered moderately challenging.

The game’s difficulty is rated as 6/10, making it accessible but still requiring skill and dedication. Players can unlock most campaign trophies in a single playthrough, but some achievements, especially those tied to Infernal difficulty, may demand multiple attempts.

Raid Mode adds additional challenges, with specific trophies requiring strategic gameplay and weapon upgrades. Overall, the trophy list is well-rounded, offering a mix of story-related, hidden, and skill-based achievements for a rewarding completion experience.

Platinum Trophy Requirements

To unlock the platinum trophy in Resident Evil Revelations, players must earn all 56 trophies, including completing the campaign, achieving specific milestones, and mastering Raid Mode.

This requires defeating the game on Infernal difficulty, finding all hidden hand prints, and obtaining every weapon and upgrade. Additionally, players must complete all Raid Mode stages and reach level 50 with a special weapon.

The journey is estimated to take around 70 hours, balancing both story progression and challenging gameplay. Dedication and strategic play are essential to achieve this prestigious trophy.

Campaign Trophies

Campaign trophies in Resident Evil Revelations are awarded for completing episodes, unlocking story-related achievements, and overcoming specific challenges. These trophies progress with the story and hidden objectives. Earning them requires skill and dedication to uncover all secrets. Completing the campaign on higher difficulties like Infernal is essential for certain trophies, while others focus on unique gameplay moments or character interactions. Each trophy adds depth to the narrative and gameplay experience, rewarding players for their progress and mastery of the story mode. These achievements are a mix of straightforward and hidden challenges, ensuring a varied journey through the campaign. The trophies highlight key moments and skills needed to fully experience the game’s story and mechanics.

Story-Related Trophies

Story-related trophies in Resident Evil Revelations are directly tied to completing key events and episodes. These include milestones like clearing Episodes 1-3 and unlocking specific narrative moments. Some trophies are awarded for progressing through the story without missing critical scenes or cutscenes. Players must ensure they follow the storyline carefully, as some trophies are easy to miss if certain actions are skipped. For example, completing the prologue or reaching specific chapters unlocks these achievements. These trophies do not require additional challenges beyond progressing through the campaign, making them accessible to all players. They serve as a reward for engaging with the game’s narrative and ensuring a complete story experience. Earning all story-related trophies is a straightforward part of the journey, but attention to detail is crucial to avoid missing any. These trophies are a fundamental step toward achieving 100% completion.

Hidden Trophies and Challenges

Resident Evil Revelations features several hidden trophies and challenges that require specific actions or discoveries. These include achievements like “Triple Play,” which involves defeating three enemies with a single grenade, and “The Pool is Open,” unlocked by activating the purification apparatus in Episode 3-2. Players must also find hidden handprints scattered throughout the game, which are tied to the “Third Eye Open” trophy. Additionally, some challenges, such as completing a chapter without taking damage or using specific weapons, add an extra layer of difficulty. These hidden achievements often require multiple playthroughs or strategic gameplay to unlock. Tips include replaying chapters on lower difficulties to easily obtain kills and using high-powered weapons for one-shot takedowns. Earning these trophies demands careful exploration, precise execution, and a thorough understanding of the game’s mechanics and secrets. Mastering these challenges is essential for achieving 100% completion and the platinum trophy.

Raid Mode Trophies

Raid Mode offers unique trophies, such as “Turning Up the Heat” for obtaining a Lv.50 special weapon, with 3.5 Ultra Rare and 11.90 Rare achievements.

Tips for Earning Raid Mode Achievements

To excel in Raid Mode, focus on leveling up your characters and weapons. Use high-powered weapons for quick kills to efficiently earn XP and currency.

Replay stages on lower difficulty settings to farm kills and resources without excessive challenge. Prioritize upgrading weapons to increase damage output and speed.

Teamplay is crucial in co-op; coordinate with a partner to tackle tough enemies and bosses. Utilize daily bonuses and events for extra rewards.

Complete challenges and daily missions to unlock exclusive content. Experiment with different character skills to optimize your playstyle for specific stages and objectives.

Specific Trophy Guides (e.g., “Triple Play,” “The Pool is Open”)

Earning specific trophies like “Triple Play” requires defeating three enemies with a single grenade, which can be achieved by throwing grenades in crowded areas during the campaign or Raid Mode.

For “The Pool is Open,” activate the purification apparatus in Episode 3-2. This involves solving a puzzle with a hidden mechanism, ensuring the pool is operational to progress.

Other challenging trophies, such as “Turning Up the Heat,” need players to obtain a Level 50 special weapon in Raid Mode through consistent leveling and upgrades.

Utilize high-damage weapons and replay stages on lower difficulties to accumulate kills and XP efficiently. Detailed strategies for each trophy ensure a smooth journey to unlocking all achievements.

Collectibles and Miscellaneous Trophies

Locate all hand print locations scattered throughout the game for a hidden trophy. Additional miscellaneous achievements involve completing specific tasks, such as defeating enemies silently or using certain weapons effectively.

Hand Print Locations

Discovering all hand print locations is a key part of achieving 100% completion in Resident Evil Revelations. These hidden collectibles are scattered throughout the game and require careful exploration.

There are a total of 15 hand prints to find, each located in specific areas across the episodes. Players must interact with these prints to unlock a special trophy.

Episode 3-2 is particularly notable, as it contains multiple hand prints near the purification device and other critical areas. Use the touchscreen in certain versions to scan for these hidden marks.

Exploring every nook and cranny, especially in dimly lit or less obvious areas, is essential. Playing on lower difficulty first can make the process less stressful, allowing you to focus on finding these collectibles.

A detailed guide or map is highly recommended to pinpoint exact locations and avoid missing any. Once all hand prints are found, you’ll earn a well-deserved trophy, bringing you closer to the platinum achievement.

General Tips for 100% Completion

Achieving 100% completion in Resident Evil Revelations requires a strategic and thorough approach. Start by completing the campaign on lower difficulties to familiarize yourself with enemy patterns and item locations.

Save frequently and manage your resources wisely, especially during tougher sections. Replay chapters to grind for kills or items needed for specific trophies, such as those requiring a high number of melee or headshots.

Explore every nook and cranny to uncover hidden collectibles and secrets, as these are crucial for certain achievements. Utilize weapons like the Shotgun or Magnum for efficient enemy takedowns and to conserve ammo.

For Raid Mode, focus on leveling up your weapons and characters to tackle higher difficulties. Lastly, refer to online guides or maps to ensure you don’t miss any hidden items or challenges.

With patience and persistence, you’ll unlock all trophies and achieve 100% completion in Resident Evil Revelations.

Continue Reading

blacksmithing guide dragonflight

Dragonflight Blacksmithing is a versatile profession that transforms raw ores into powerful weapons and armor, offering crafting flexibility and economic opportunities for players in WoW Dragonflight․

1․1 What is Blacksmithing in Dragonflight?

Blacksmithing in Dragonflight is a crafting profession that allows players to create weapons, armor, and other metal items by processing ores and minerals․ It is a key profession for equipping characters with high-quality gear and is closely tied to Mining, as it relies heavily on mined materials․ Blacksmithing offers flexibility in crafting gear for various classes and specs, making it a valuable skill for both PvE and PvP content․ Players can specialize in different types of crafting, such as weapons or armor, to optimize their output․ The profession also plays a role in the game’s economy, as crafted items can be sold for gold․ With the right recipes and resources, Blacksmithing becomes a powerful tool for progression and profit in Dragonflight․

1․2 Importance of Blacksmithing in WoW Dragonflight

Blacksmithing plays a crucial role in Dragonflight by enabling players to craft high-quality weapons and armor, essential for character progression․ It complements Mining, providing a steady supply of materials, and offers economic opportunities through selling crafted items․ This profession is vital for equipping characters effectively, making it a cornerstone for both PvE and PvP activities, and a key contributor to the in-game economy․

Dragonflight Blacksmithing Trainers

Dragonflight Blacksmithing trainers are experts located in key zones, offering specialized training and recipes․ They include Metalshaper Kuroko in Valdrakken, Kholmar Sunrunner in The Waking Shores, and others․

2․1 Locations of Blacksmithing Trainers in Dragonflight

Dragonflight Blacksmithing trainers are situated in major hubs, including Valdrakken, The Waking Shores, and Ohnahran Plains․ Metalshaper Kuroko resides in Valdrakken, while Kholmar Sunrunner can be found in The Waking Shores․ Farrier Josu is located in Ohnahran Plains, providing easy access to training and recipe acquisition for players seeking to master the profession․

2․2 Notable Trainers and Their Specializations

Metalshaper Kuroko in Valdrakken specializes in crafting high-end gear, while Kholmar Sunrunner in The Waking Shores excels in mail armor․ Farrier Josu in Ohnahran Plains focuses on masterwork crafting, and Custodian Xarath in The Ruby Feast offers expertise in weapon crafting․ Each trainer provides unique recipes and insights, helping players refine their Blacksmithing skills and create specialized items tailored to specific needs and playstyles․

Leveling Blacksmithing from 1 to 100

Leveling Blacksmithing involves crafting items to gain skill points, starting with vendor-learned recipes up to skill 50, then requiring renown or Knowledge points for further progression efficiently․

3․1 Optimal Leveling Paths and Strategies

Start by crafting vendor-learned recipes to reach skill 50, then progress using Knowledge points or renown for higher-level recipes․ Focus on crafting items with high skill gains, prioritize materials from Mining for efficiency, and consider crafting in bulk to minimize downtime․ Pairing Blacksmithing with Mining ensures a steady material supply, reducing costs and accelerating skill progression to 100 efficiently․

3․2 Best Recipes for Skill-Ups and Crafting Efficiency

Focus on crafting recipes with high skill gain potential, such as Draconic Steel Plates and Infernal Edge, to efficiently level up․ Prioritize items that use readily available materials and offer consistent skill improvements․ Unlocking higher-tier recipes through Knowledge points or renown is crucial for maximizing efficiency․ Crafting in bulk and utilizing Mining-sourced materials can significantly reduce costs and accelerate progression to skill level 100․

Blacksmithing Recipes in Dragonflight

Dragonflight Blacksmithing offers a wide variety of recipes, from basic tools to high-end gear, sourced from trainers, vendors, and renown rewards, with many unlocked through progression․

4․1 Sources of Blacksmithing Recipes

Blacksmithing recipes in Dragonflight can be obtained from various sources, including professional trainers, vendors, and renown rewards․ Some recipes are exclusive to specific factions or areas, requiring exploration and progression to unlock․ Additionally, certain high-end patterns may be discovered through special events or drops, adding depth to the crafting experience in WoW Dragonflight․

4․2 Rare and Special Recipes in Dragonflight

Rare and special recipes in Dragonflight offer unique crafting opportunities, often requiring specific renown levels or event participation․ These exclusive patterns allow blacksmiths to craft powerful gear or decorative items, setting them apart from others․ Such recipes are highly sought after for their ability to create distinctive and valuable items, making them a key focus for advanced blacksmiths aiming to excel in WoW Dragonflight․

Blacksmithing Specializations

Blacksmithing Specializations enhance crafting efficiency and gear quality, offering unique benefits for creating weapons, armor, and tools․ These specializations allow blacksmiths to excel in specific crafting areas, improving overall productivity and item effectiveness in Dragonflight․

5․1 Unlocking Blacksmithing Knowledge and Specializations

Unlocking Blacksmithing Knowledge and Specializations requires skill level 50 and beyond, often through renown or Knowledge points․ These specializations enhance crafting efficiency and unlock advanced recipes, allowing blacksmiths to create high-tier gear and tools․ Specializations are crucial for optimizing gear production and maximizing profession potential in Dragonflight, offering unique crafting advantages for specific item types․

5․2 Benefits of Specializations for Crafting and Gear

Specializations in Dragonflight Blacksmithing enhance crafting efficiency and gear quality․ They unlock advanced recipes, improve resource utilization, and boost item stats․ Specialized blacksmiths can craft high-tier weapons and armor, meeting specific class demands․ These enhancements increase the viability of crafted gear in endgame content, making blacksmiths indispensable for progression and ensuring their creations remain competitive in the WoW Dragonflight economy․

Making Gold with Blacksmithing

Blacksmithing offers significant gold-making opportunities through crafting high-demand gear and selling it at the auction house․ By creating valuable weapons and armor, players can generate substantial profit efficiently․

6․1 Profitable Crafting and Selling Strategies

Focus on crafting high-demand items like weapons and armor, which are consistently sought after by players․ Utilize the auction house to sell crafted gear at competitive prices․ Prioritize recipes with low material costs but high resale value, ensuring a steady profit margin․ Additionally, crafting rare or specialized items can yield higher returns, especially during peak demand periods or when specific content is popular․ Staying attuned to market trends and player needs is key to maximizing profitability․ This approach allows blacksmiths to maintain a lucrative income stream while minimizing material waste and optimizing resource use․ By strategically selecting and timing crafted items, players can efficiently turn their blacksmithing skills into gold․

6․2 Demand for Blacksmithing Products in Dragonflight

Demand for blacksmithing products remains high in Dragonflight, driven by players’ needs for weapons, armor, and gear upgrades․ Endgame content like raids and Mythic+ dungeons fuels consistent demand, especially for rare or high-quality items․ Crafted gear, particularly from exclusive recipes, is highly sought after, making blacksmithing a valuable profession for both progression and profit․ Staying attuned to market trends ensures optimal sales and maximizes income potential․

Best Races for Blacksmithing

Certain races excel in blacksmithing due to racial bonuses that enhance crafting efficiency or effectiveness, making them top choices for maximizing the profession’s potential in Dragonflight․

7․1 Racial Bonuses and Their Impact on Blacksmithing

Racial bonuses significantly influence blacksmithing efficiency․ For example, Gnomes gain increased intellect, boosting crafting precision, while Dwarves benefit from improved weapon and armor crafting․ Orcs enjoy reduced material costs, enhancing profitability․ Humans and Worgen also offer versatile bonuses that complement crafting․ These traits can enhance resource management, skill progression, and overall crafting effectiveness for blacksmiths․

7․2 Top Races for Maximizing Blacksmithing Efficiency

Dwarves and Gnomes are top choices for blacksmithing, as they offer bonuses that enhance crafting and resource efficiency․ Dwarves gain bonuses to mining and weapon crafting, while Gnomes benefit from increased intellect for better precision․ Orcs also excel due to reduced material costs and stamina boosts․ These racial traits enhance resource management and overall crafting effectiveness, making them ideal for blacksmiths aiming to maximize efficiency and productivity in Dragonflight․

Blacksmithing and Mining Synergy

Mining is a must-have profession for blacksmiths, providing essential ores for crafting․ Together, they offer material efficiency, cost savings, and self-sufficiency in creating high-quality gear․

8․1 Why Mining is a Must-Have Profession for Blacksmiths

Mining is essential for blacksmiths as it provides the raw ores needed for crafting weapons and armor․ Having both professions ensures a steady supply of materials, reduces reliance on the auction house, and saves gold․ This synergy allows blacksmiths to craft high-quality gear efficiently, making mining a crucial companion profession for maximizing productivity and profitability․

8․2 How to Level Mining Alongside Blacksmithing

Leveling Mining alongside Blacksmithing is efficient, as it provides the necessary ores for crafting․ Start by focusing on resource-rich zones like The Waking Shores and Valdrakken․ If playing a Dwarf, utilize the racial Mining bonus for easier progression․ Alternate between leveling both professions to maintain a steady material supply․ Consider crafting items like pickaxe enhancements to boost Mining efficiency․ Plan your progression by prioritizing high-demand ores for both professions․ Balance time spent on each skill to avoid resource shortages․ Complete quests that offer profession experience boosts․ Manage costs by using self-mined materials for crafting․ Join a guild for shared resources and tips, enhancing your overall progression․ Structured planning ensures efficient use of time and resources, maximizing the benefits of both professions in Dragonflight․

Gear Options and Crafting Guide

Craft weapons, armor, and gear in Dragonflight using Blacksmithing․ Create items for various classes and specs, enhancing their performance in combat and gameplay․

9․1 Crafting Weapons, Armor, and Gear in Dragonflight

Crafting weapons, armor, and gear in Dragonflight involves refining ores into powerful items․ Blacksmithing allows players to create weapons like swords and axes, as well as plate armor, enhancing character utility․ Crafting gear not only equips your character but also provides valuable items for alts or the in-game market, making it a versatile profession for both progression and economy․

9․2 Best-in-Slot Gear for Different Classes and Specs

Dragonflight Blacksmithing excels at crafting best-in-slot gear for various classes and specs․ Plate-wearing classes like Warriors and Paladins benefit from high-strength, stamina, or critical strike gear․ Blacksmiths can craft weapons and armor tailored to specific roles, such as DPS, tanking, or healing, ensuring optimal performance in raids and dungeons․

Endgame Blacksmithing Content

Dragonflight Blacksmithing endgame focuses on mastering high-tier recipes, crafting powerful gear, and optimizing equipment through Blacksmithing Knowledge and Specializations to enhance gameplay and character performance․

10;1 Blacksmithing Knowledge and Skill Cap

Blacksmithing Knowledge in Dragonflight represents the pinnacle of skill mastery, allowing players to unlock advanced crafting techniques and enhance their gear․ Achieving the skill cap of 100 requires careful planning, as it involves obtaining rare recipes and utilizing Knowledge points gained through renown or crafting․ This expertise enables blacksmiths to create high-end items, optimize gear stats, and remain competitive in both PvE and PvP environments, ensuring peak performance for their characters․

10․2 Endgame Crafting and Gear Optimization

Endgame crafting in Dragonflight Blacksmithing focuses on creating powerful gear optimized for specific classes and playstyles․ Players can craft high-end weapons and armor using rare materials and unlocked recipes, ensuring gear meets demanding performance standards․ This process involves refining stats, enhancing durability, and tailoring items to maximize effectiveness in raids, dungeons, or PvP, showcasing mastery of the blacksmithing craft․

Optimizing Your Blacksmithing Skill

Optimizing your Blacksmithing skill involves efficient resource management and maximizing skill gains through strategic crafting choices, ensuring progress is steady and material usage is minimized․

11․1 Efficient Use of Resources and Materials

Efficiently using resources in Dragonflight Blacksmithing involves planning crafting sessions, minimizing material waste, and prioritizing recipes that offer skill gains․ Crafting items with high demand ensures resources are not squandered, while professions like Enchanting can convert unused items into materials․ Additionally, crafting on-demand rather than mass-producing helps maintain resource efficiency and reduces costs over time․

11․2 Maximizing Skill Gains and Crafting Speed

To maximize skill gains and crafting speed in Dragonflight Blacksmithing, focus on crafting high-skill recipes, use crafting orders for bonus experience, and organize your crafting sessions to prioritize high-demand items․ Leveraging contracted work and optimizing your material supply ensures efficient progression, allowing you to quickly reach higher skill levels and craft gear effectively․

Mastering Dragonflight Blacksmithing offers a rewarding journey, from crafting essential gear to achieving economic success․ With dedication, you’ll unlock its full potential and shape your WoW destiny․

12․1 Final Tips for Mastering Dragonflight Blacksmithing

To excel in Dragonflight Blacksmithing, focus on optimizing your crafting efficiency by using high-demand recipes and managing resources wisely․ Pairing Blacksmithing with Mining ensures a steady supply of materials, reducing costs and enhancing profitability․ Regularly check the market for trends to maximize gold-making opportunities and stay competitive․ Experiment with different specializations to tailor your crafting to your playstyle and goals․ By consistently practicing and adapting to the game’s economy, you’ll become a master blacksmith, capable of creating exceptional gear and achieving long-term success in WoW Dragonflight․

12․2 Future of Blacksmithing in WoW Dragonflight

Dragonflight Blacksmithing continues to evolve, with Blizzard introducing new content and expansions that expand crafting possibilities․ Players can expect fresh recipes, challenges, and opportunities to enhance their skills․ Staying updated with patch notes and adapting to market demands will ensure long-term success․ As WoW grows, Blacksmithing remains a cornerstone profession, offering both practical and economic benefits for dedicated crafters and adventurers alike․

Continue Reading